

What is Spec-Driven Development?
Spec-driven development (SDD) is a workflow where specifications serve as the foundation for all implementation work. Instead of requirements living in disconnected documents, specs become version-controlled, queryable artifacts that evolve alongside your code through bidirectional feedback between humans and AI agents.Spec-driven development treats specifications as first-class citizens in your codebase, creating a continuous feedback loop between design intent and implementation reality.
- Write requirements (Google Docs, Notion, Jira)
- Implementation begins
- Requirements drift from reality
- Documentation becomes stale
- Context is lost
- Write specs as version-controlled markdown
- AI agents generate tasks as issues from the spec
- Agents execute tasks, discovering ambiguities
- AI agents provide feedback to the spec as they process issues
- Users can update specs based on learnings
- Spec remains synchronized with implementation
- Context is durable and queryable
How sudocode Implements SDD
sudocode provides the infrastructure for spec-driven development:Specs as First-Class Entities
Specs are version-controlled markdown files stored in.sudocode/specs/:
- Each spec has a unique ID (e.g.,
s-50kd) - Contains requirements, architecture, and design decisions
- Supports hierarchical organization (parent-child specs)
- Queryable through CLI, MCP, and web UI
Issues Implement Specs
Issues are work items linked to specifications:- Created by agents or humans
- Linked to specs via
implementsrelationship - Track implementation progress and dependencies
- Provide feedback back to specs during implementation
Anchored Feedback System
Agents provide feedback on specs as they discover ambiguities:- Feedback anchored to specific lines in the spec
- Anchors auto-relocate when specs are edited
- Humans review feedback and update specs accordingly
- Keeps specs synchronized with implementation reality
Dependency Graph
Work is modeled as a directed acyclic graph:- Issues block other issues via
blocksrelationships ready()query finds unblocked work- Agents claim ready work and implement features
- Completion automatically unblocks dependent work
The Spec-Driven Development Workflow
1
1. Co-create Spec with Agent
Describe what you want to build, then collaborate with your agent to design itStart by describing your feature to your AI agent. The agent will explore your codebase, propose design approaches, and discuss trade-offs with you:As the agent explores, feel free to ask questions, provide constraints, and refine your requirements to scope the problem as much as possible.Review the spec in the web UI at
localhost:3000 and provide feedback or edits as needed.Tips for effective spec co-creation
Tips for effective spec co-creation
- Start conversational: Describe intent, not implementation
- Give agents context: Give agents necessary context about the codebase, to maximize their understanding
- Refine together: Provide decisions, agent captures in spec
- Review visually: Use web UI to inspect final spec
2
2. Generate Implementation Plan
Agent breaks down the spec into issues and models dependenciesAsk your agent to create implementation issues from the spec:The agent will:Review the issues and dependency graph in the web UI to verify the plan makes sense.
- Read the spec via
show_spec()to understand requirements - Identify natural breakdown (database → domain → API → testing)
- Create issues via
upsert_issue()for each component - Link issues to spec via
link(type: "implements") - Model dependencies via
link(type: "blocks")to establish execution order
3
3. Execute Issues
Agents work through issues in dependency orderDispatch agents to implement issues from the web UI at
localhost:3000How agents execute work:- Claim issue via
upsert_issue(status: "in_progress") - Read spec and issue details for context
- Implement the feature
- Close issue with completion summary and feedback via
add_feedback() - Next work automatically becomes ready
- Web UI: Click “Dispatch Agent” on ready issues in kanban board
- Conversation: Agent claims work directly through MCP server
4
4. Agent Provides Feedback
Agents surface ambiguities and learnings during implementationAs agents implement issues, they may discover spec ambiguities or edge cases. Agents provide feedback anchored to specific spec lines:Feedback is visible in the web UI and survives spec edits through smart anchor relocation.Feedback types:
- request: Need clarification or decision
- suggestion: Improvement ideas from implementation learnings
- comment: Observations or additional context
5
5. Iterate on Spec
Review feedback and update specs based on learningsReview agent feedback in the web UI and update the spec accordingly:The spec evolves to stay synchronized with implementation reality. If agent feedback reveals missing work, ask the agent to create new issues and link them appropriately.
6
6. Track Progress
Monitor project health through the issues boardView your project’s status visually in the web UIThe issues board shows:
- Ready column: Issues with no blockers, ready to be claimed
- In Progress column: Issues currently being worked on
- Blocked column: Issues waiting on dependencies
- Completed column: Finished work
Complete Example Walkthrough
Let’s walk through building a saved credit card feature for a payments API from start to finish. This example shows the full spec-driven development workflow with agent MCP and web-server interactions.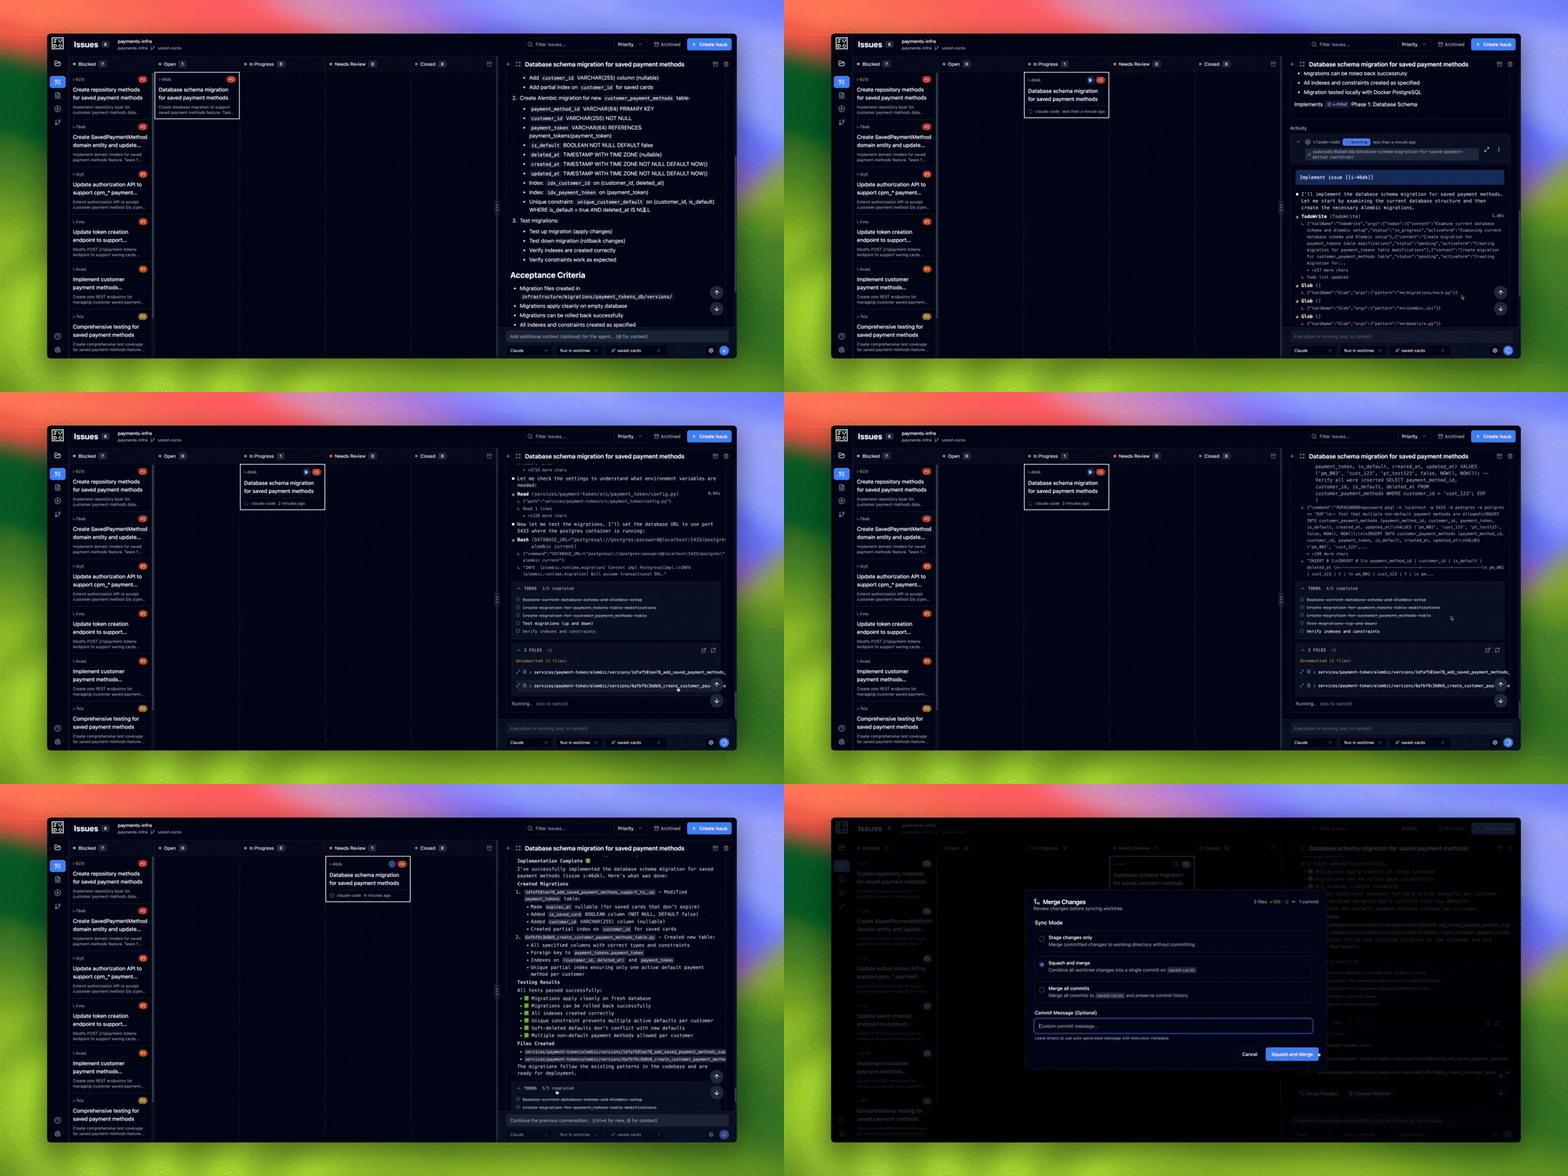
Phase 1: Co-create Specification with Agent
Step 1: Start the conversation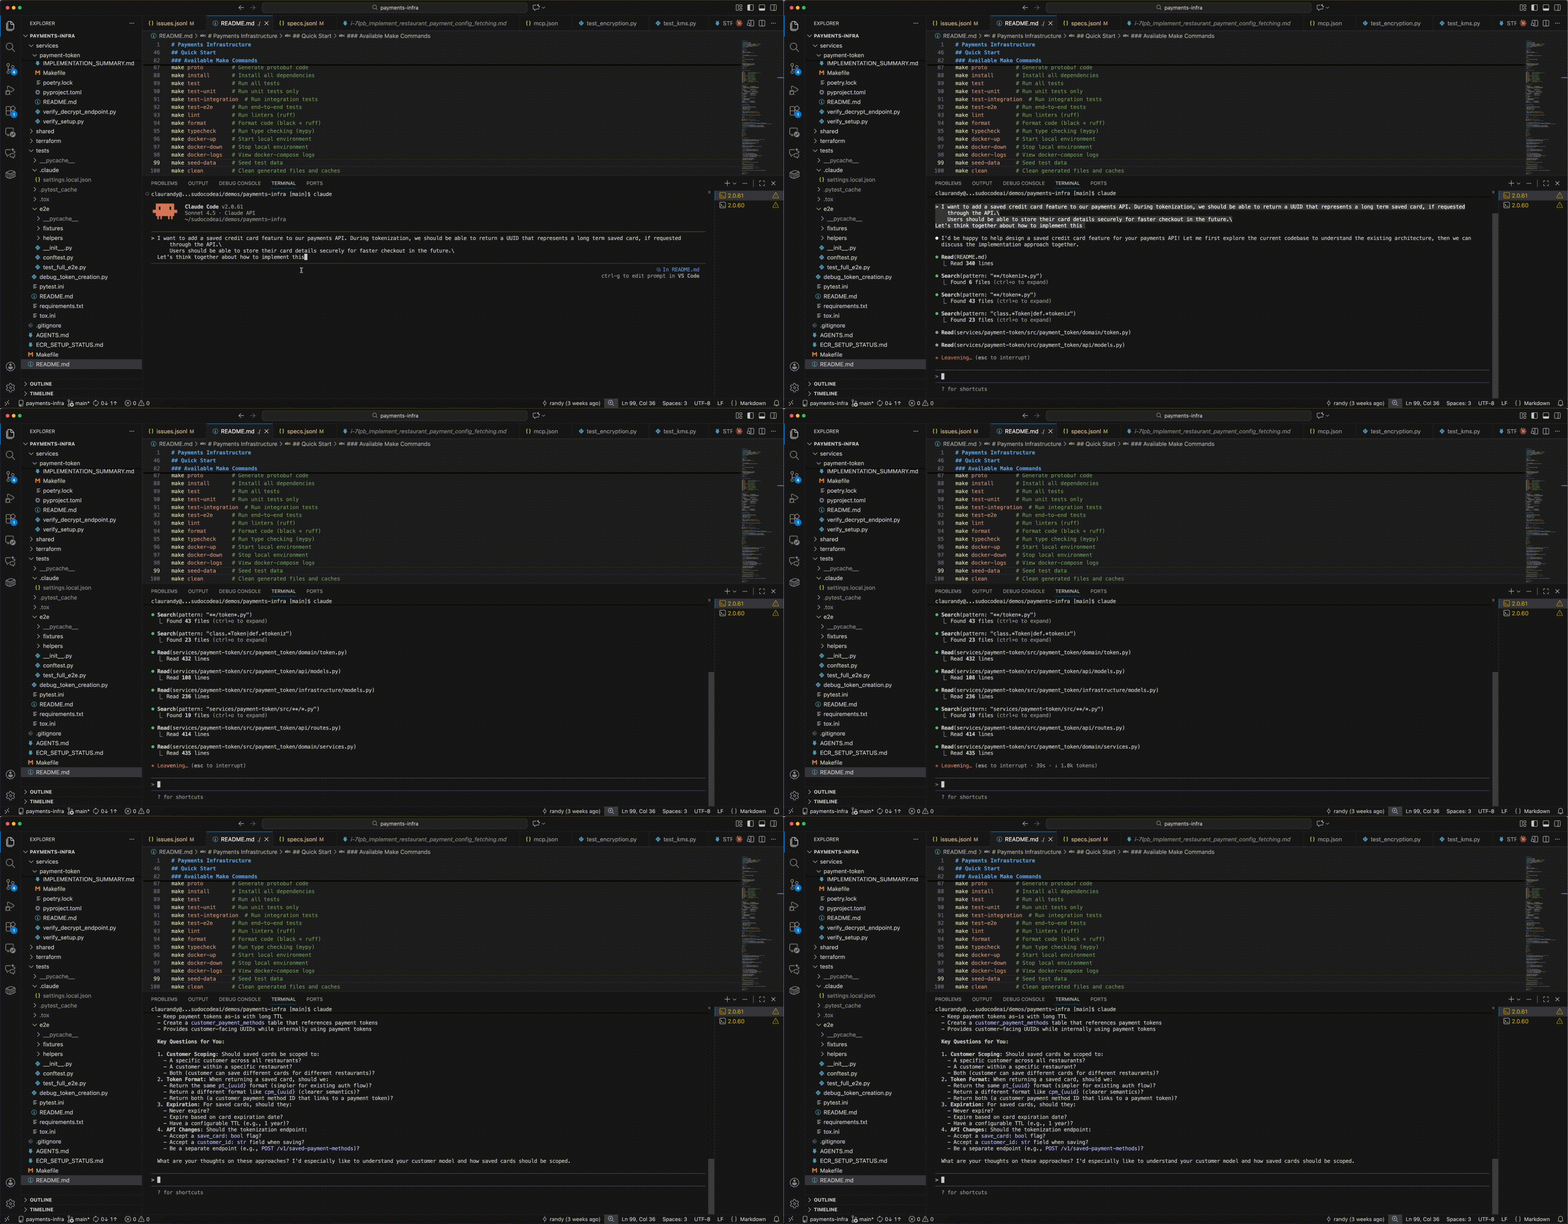
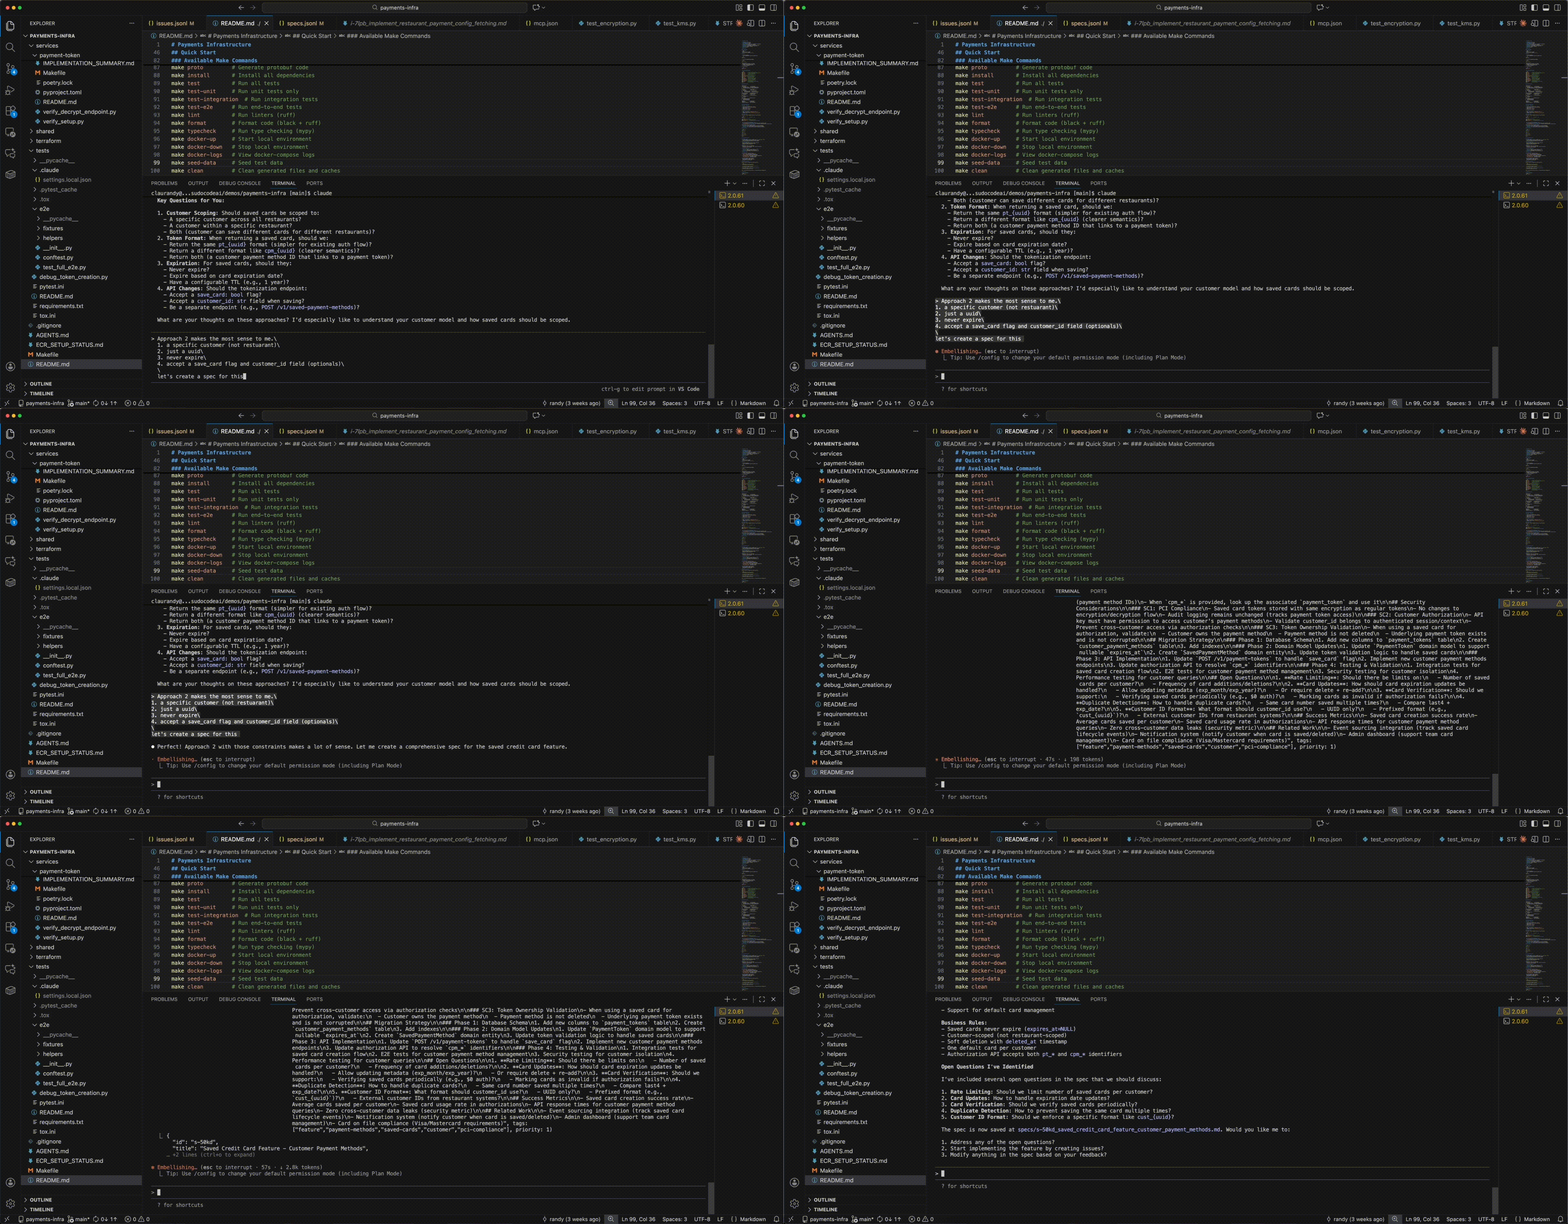
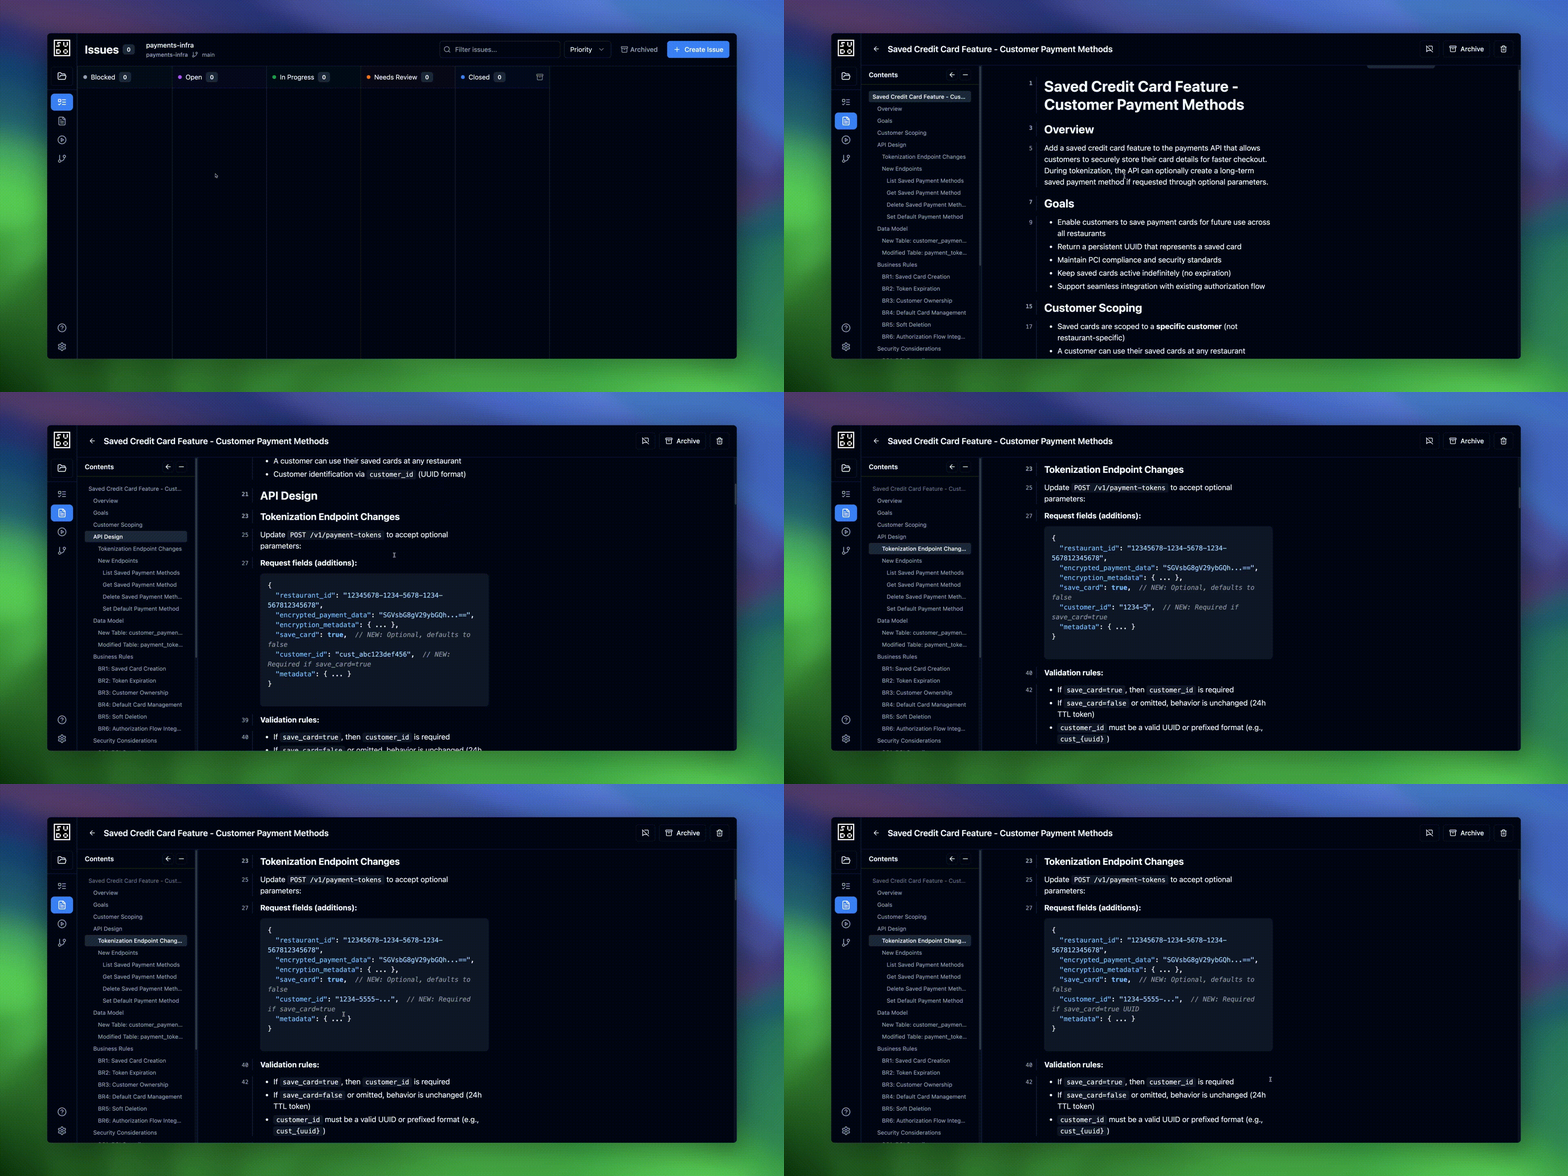
localhost:3000 in your browser to review the spec visually:
- See the full spec with rendered markdown
- Review the data model, API design, and business rules
- Leave feedback or make edits as needed
- Update the spec based on any refinements
Phase 2: Generate Implementation Plan
Step 7: Agent breaks down spec into issues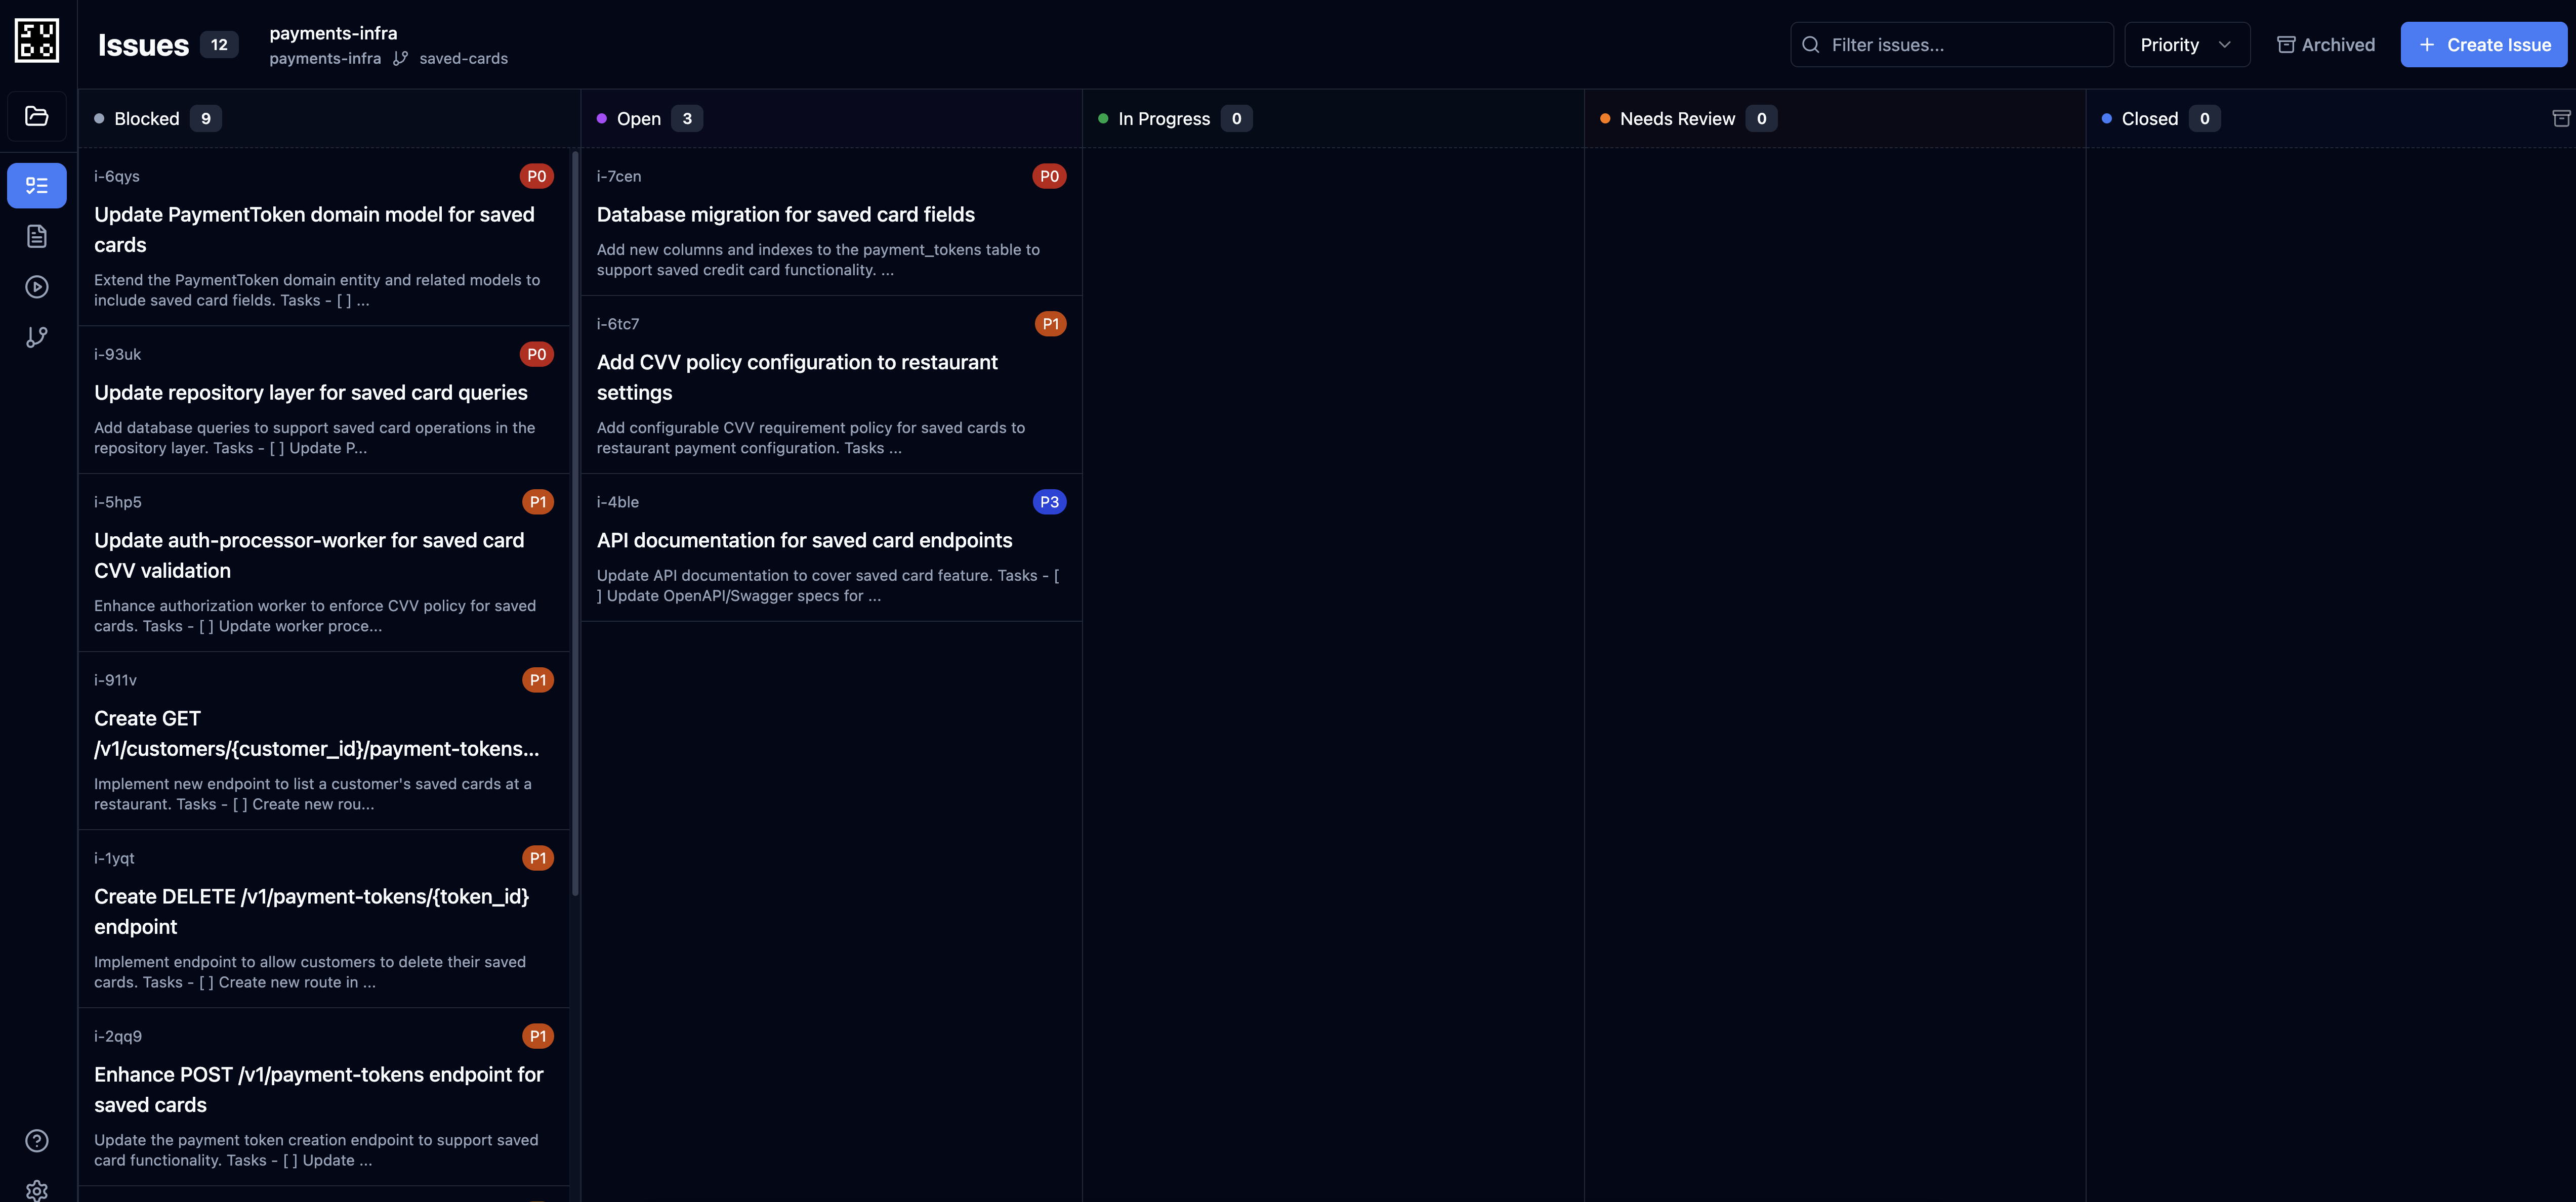
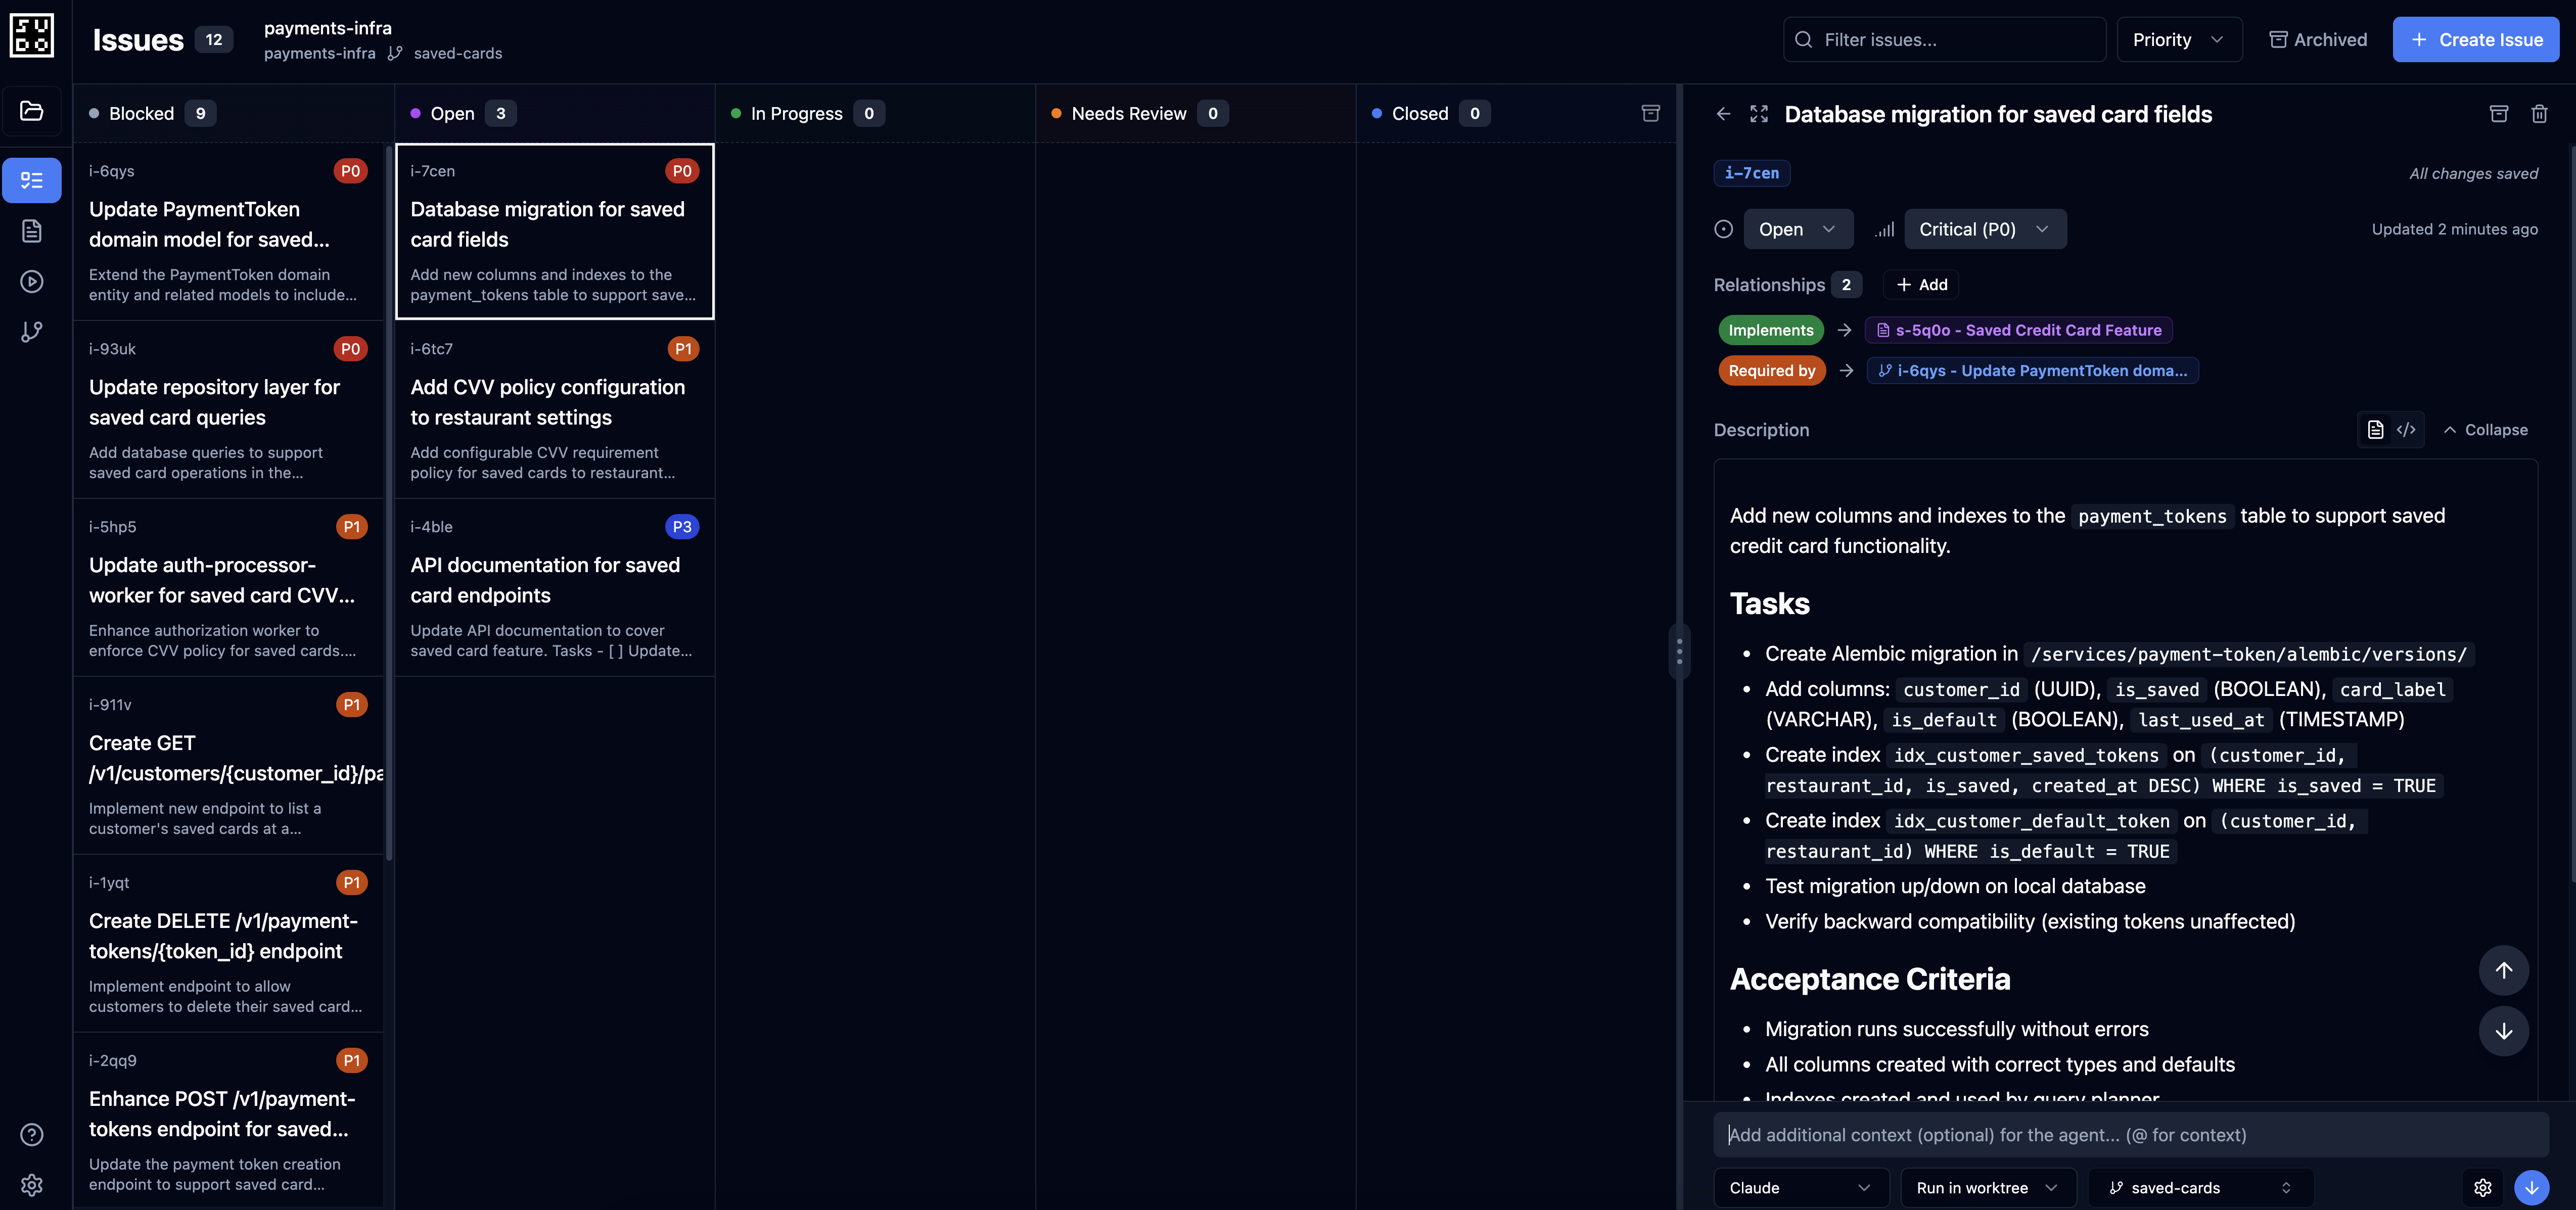
localhost:3000 and navigate to the Issues board:
- Review all 8 issues created by the agent
- Check priorities and dependencies
- Modify issue descriptions if needed
- Verify the dependency graph makes sense
Phase 3: Execute Issues
Before dispatching agents: Commit any uncommitted changes in your repository. The web UI creates worktrees for agent execution, and worktrees require a clean working directory.
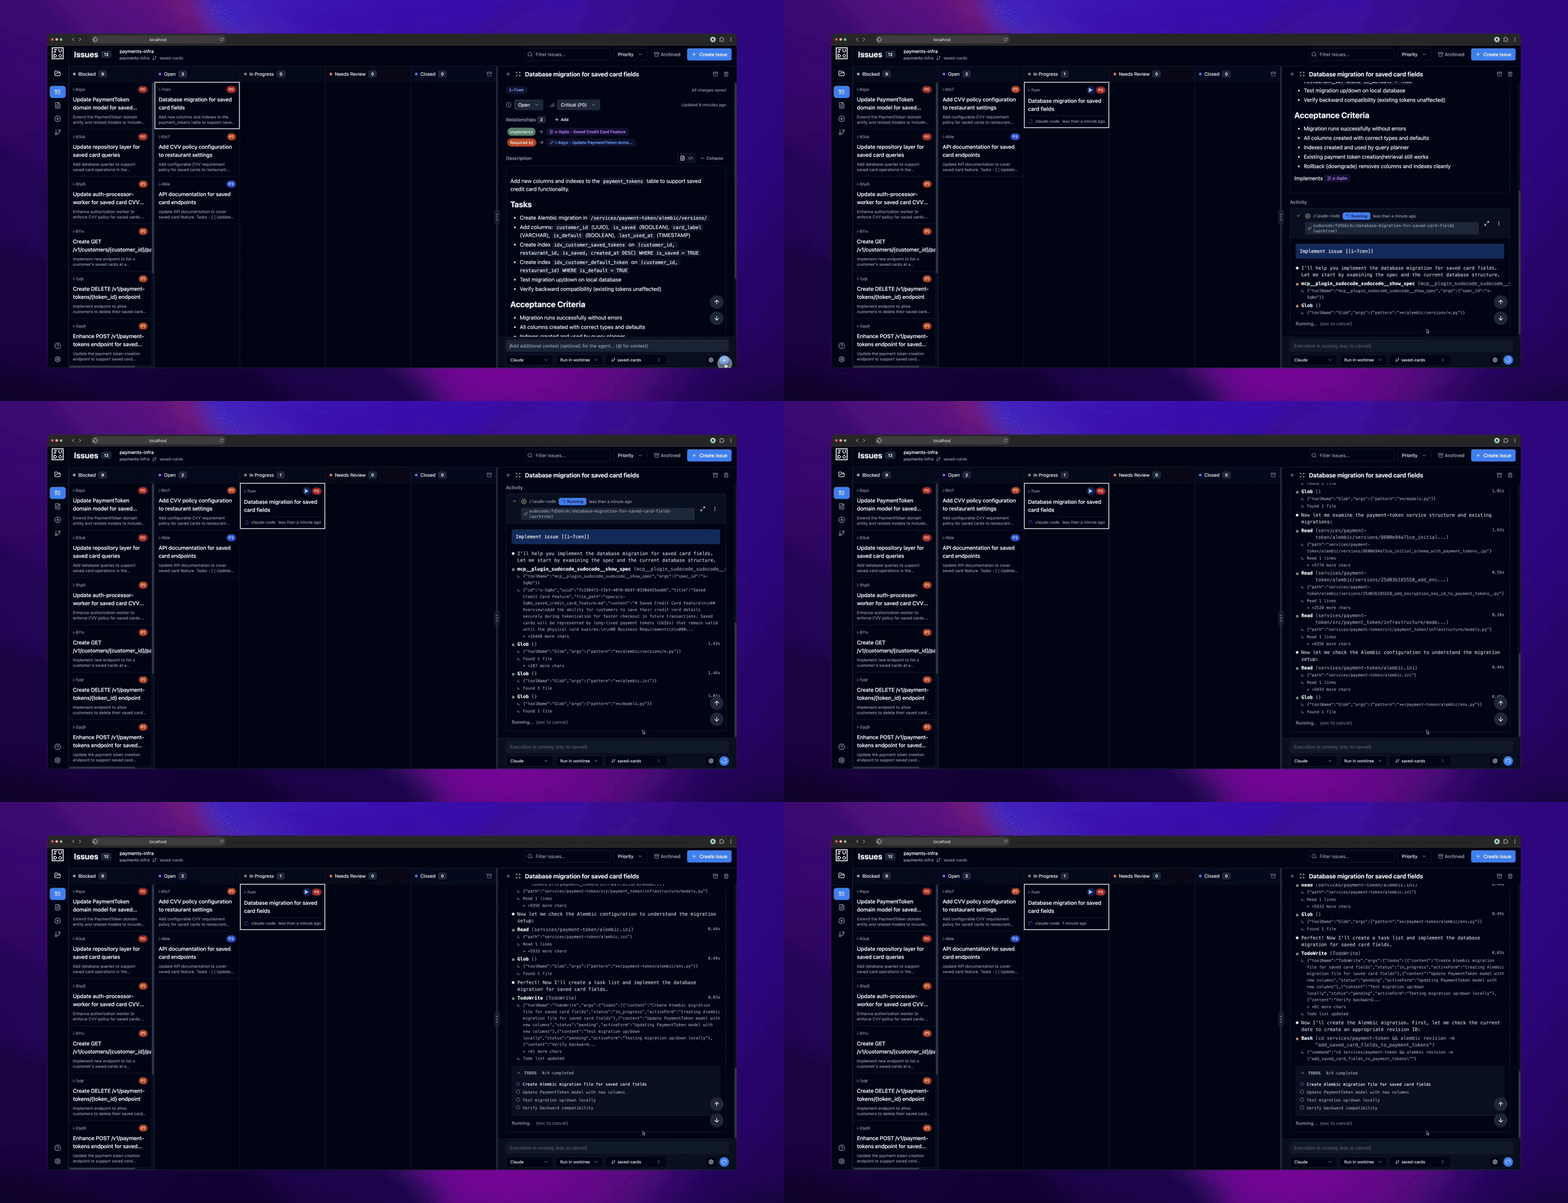
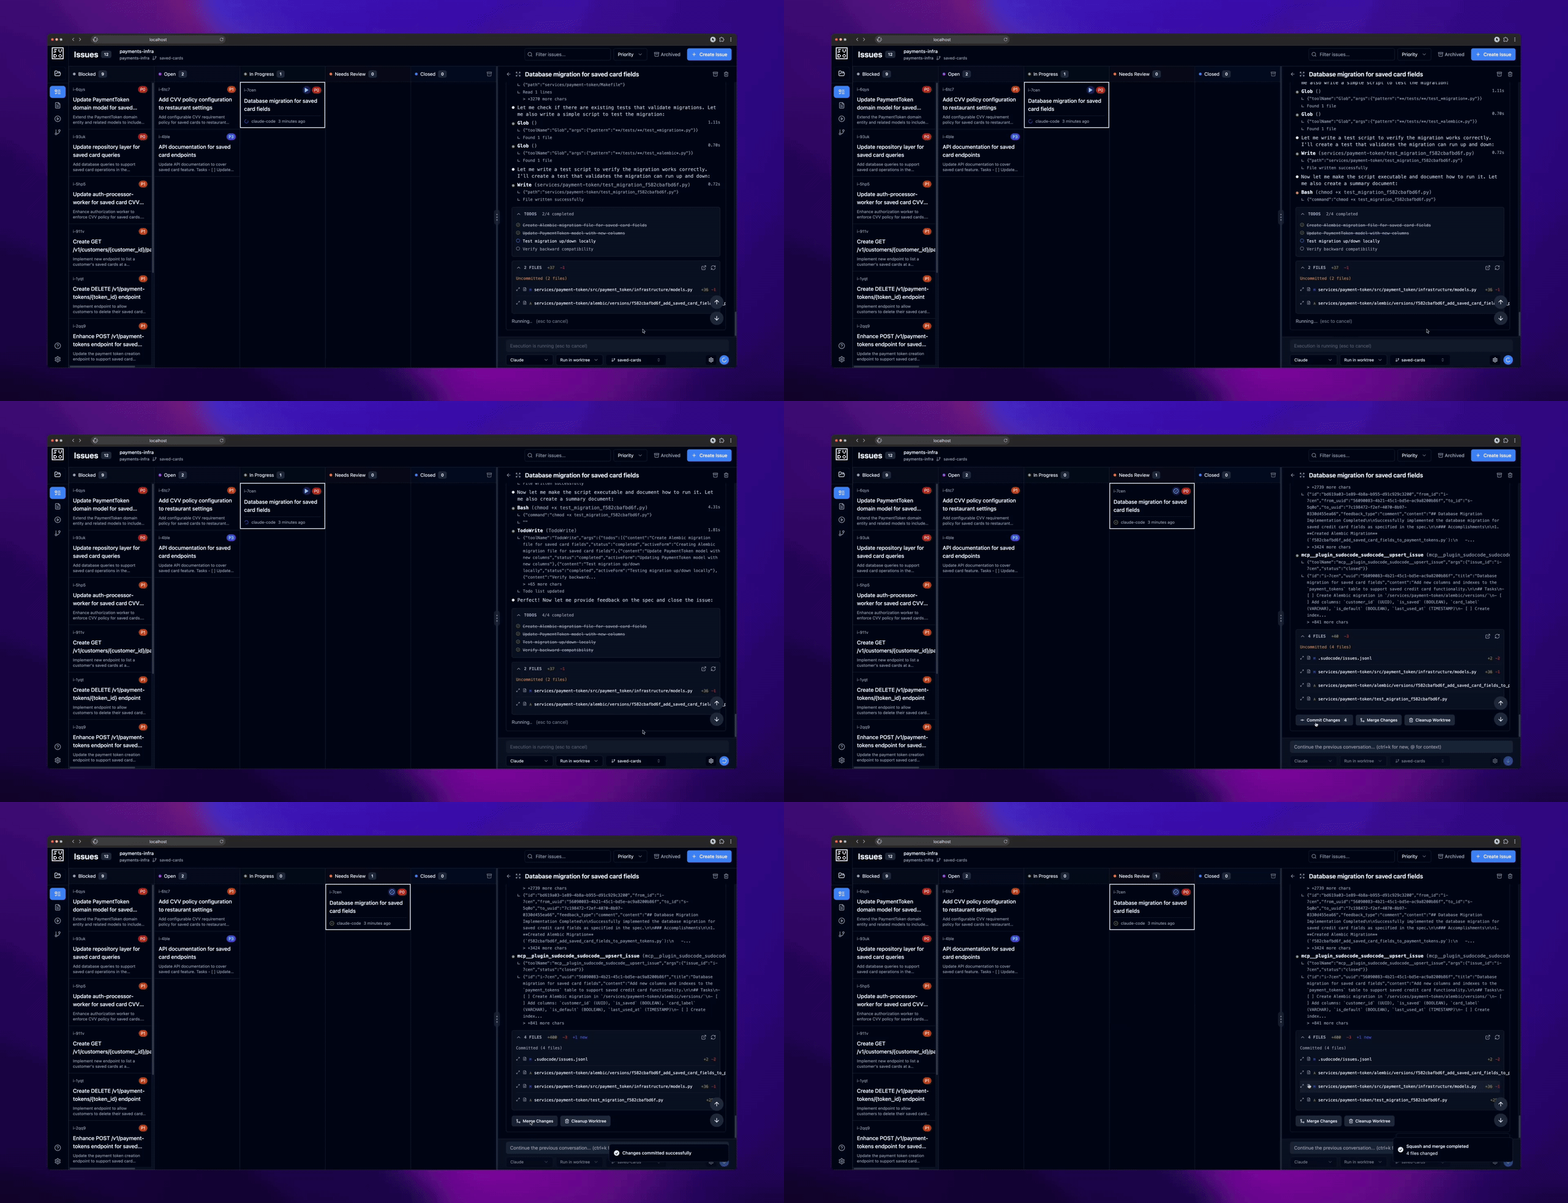
- Commit any uncommitted changes in the worktree
- Squash and merge the worktree commits to your main branch
Phase 4: Completion
All issues completed: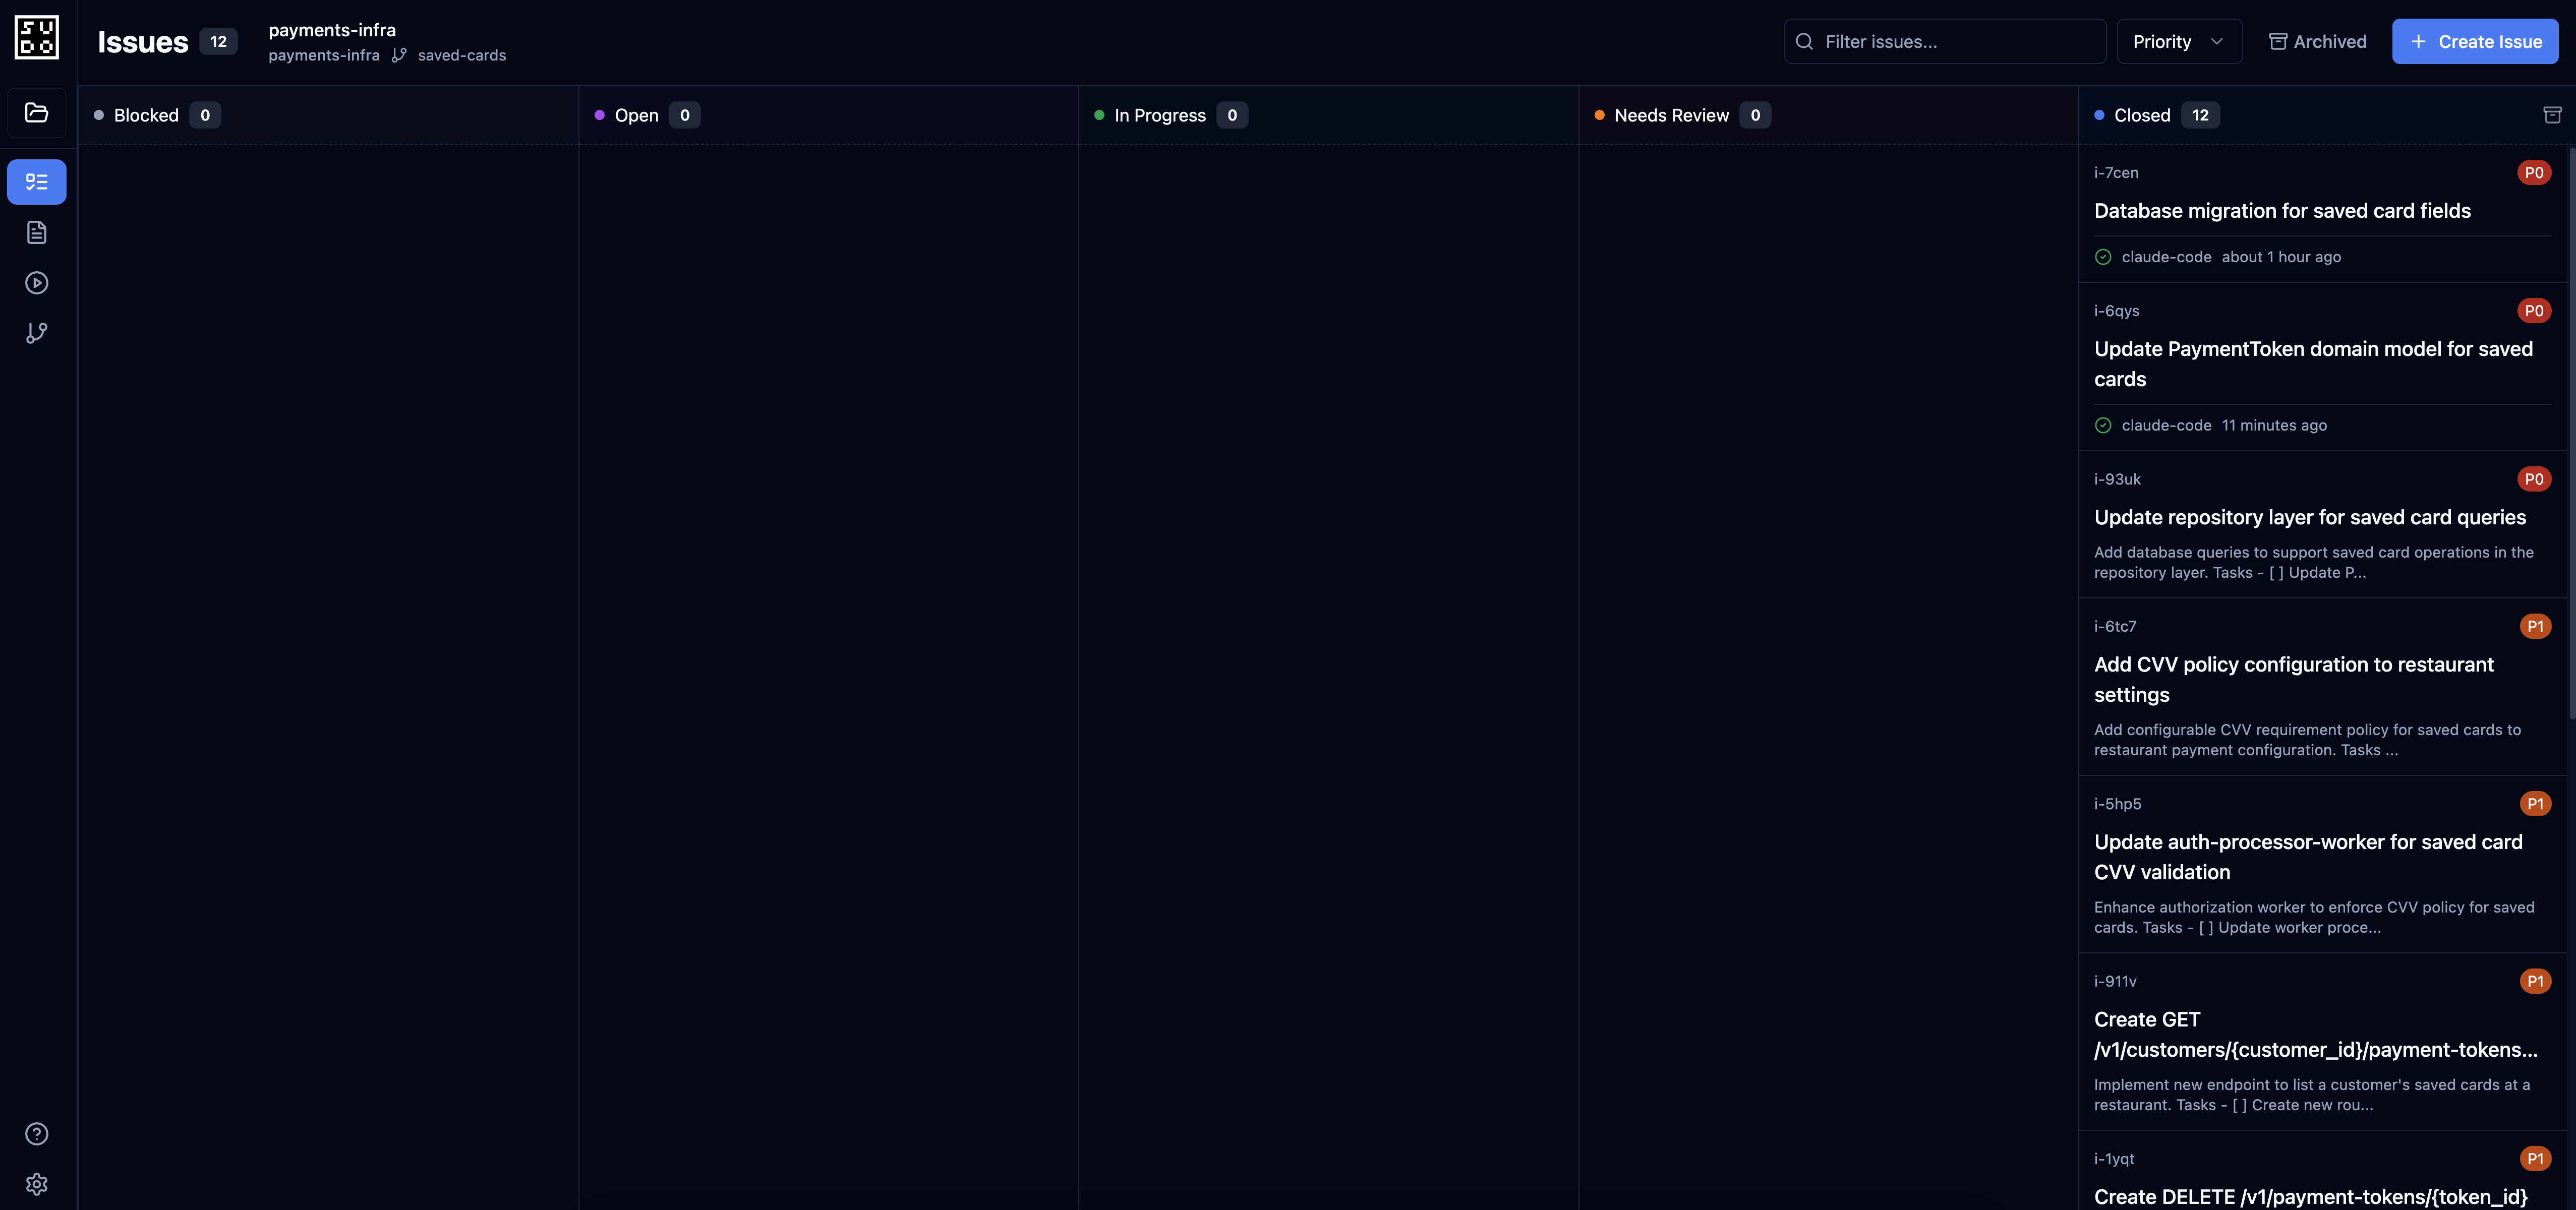
Best Practices
Co-create specs through conversation
Co-create specs through conversation
Start by describing what you want to build, then collaborate with your agent to design it.Approach:Tips:
- Provide context about constraints and requirements
- Discuss trade-offs before committing to an approach
- Let agents explore the codebase to understand existing patterns
- Review the spec in the web UI and refine as needed
- Leverages agent’s codebase knowledge
- Captures design decisions early
- Creates shared understanding
- Results in actionable, contextual specs
Use the web UI for visual review
Use the web UI for visual review
Open
localhost:3000 to review and manage your work visually.What to review:- Specs: View rendered markdown, leave feedback, edit content
- Issues board: See ready/in-progress/blocked/completed work
- Dependencies: Visualize the dependency graph
- Feedback: Review agent feedback on specs with line anchors
- Worktrees: Monitor agent execution and merge results
- Better understanding of project state
- Easier to spot issues in the dependency graph
- More natural way to read and edit specs
- Visual feedback on progress
Start high-level, refine iteratively
Start high-level, refine iteratively
Don’t try to specify everything upfront. Start with:
- Core requirements
- Key constraints
- Open questions
Keep issues small and focused
Keep issues small and focused
Issues should be agent-scoped: completable in one session.Too large:Right size:Benefits:
- Parallel work possible
- Clear completion criteria
- Easy to track progress
- Reduces blocking
Guide agents to model dependencies
Guide agents to model dependencies
After agents create issues, ask them to establish dependency relationships.Example:Review the dependency graph in the web UI to ensure:
- Foundation work blocks dependent work
- Parallel work is properly independent
- No circular dependencies exist
- Automatic
ready()filtering - Parallel work discovery
- Bottleneck identification
- Clear execution order
Review agent work when merging worktrees
Review agent work when merging worktrees
When an agent completes work in a worktree, review before merging.Workflow:
- Agent completes issue in isolated worktree
- Review the changes in the worktree and commit
- Click “Merge Worktree” button in web UI
- Commit the merged changes to your branch
- Implementation matches spec requirements
- Code quality and test coverage
- No unintended changes or side effects
- Agent feedback on spec is addressed
- Maintain code quality
- Catch issues early
- Keep main branch clean
- Learn from agent implementation choices
Commit merged worktrees promptly
Commit merged worktrees promptly
After merging a worktree, commit the changes to your branch immediately.Benefits:
- Clean git history
- Easy to track which issue each commit addresses
- Context preserved for future reference
- Enables rolling back individual features if needed
Common Patterns
Pattern: Spec-First Feature Development
Pattern: Multi-Agent Parallel Development
Dispatch multiple agents in parallel using worktrees:Pattern: Feedback-Driven Spec Refinement
Pattern: Hierarchical Spec Organization
Troubleshooting
No issues are ready (everything blocked)
No issues are ready (everything blocked)
Cause: Circular dependencies or all work depends on blocked itemsSolution:Work with your agent to investigate the blocking chain:For circular dependencies:Collaborate with your agent to identify and break the cycle:Alternatively, you might need to create an intermediate issue:
Too many issues created upfront
Too many issues created upfront
Cause: Over-planning before implementation learningsSolution:Break large specs into smaller sub-specs for iterative planning:Approach:
- Create only foundation issues for the first sub-spec
- Let agents discover additional work during implementation
- Use
discovered-fromrelationship for issues found during work - Create new sub-specs as you learn more about requirements
- Allow specs to evolve based on implementation reality
- Reduces upfront planning burden
- Adapts to learnings during implementation
- Keeps issues focused and actionable
- Enables parallel work on independent sub-specs
Merge conflicts in issues.jsonl or specs.jsonl
Merge conflicts in issues.jsonl or specs.jsonl
Cause: Multiple worktrees modified issues or specs simultaneouslySolution:When merging a worktree introduces conflicts in Then commit the resolved changes:Prevention tips:
.sudocode/issues.jsonl or .sudocode/specs.jsonl:- Commit and merge worktrees promptly after completion
- Avoid having multiple agents modify the same issues simultaneously
- Use the web UI to monitor which issues are in progress
Feedback anchors become stale
Feedback anchors become stale
Cause: Large spec refactorings move contentSolution:
Related Documentation
Specs Concept
Deep dive into specifications
Feedback System
Anchored feedback mechanics
Agent Workflows
MCP workflow examples
Graph Planning
Dependency graph concepts
MCP Tools
AI agent integration