Prerequisites
Before setting up any Agent, ensure you have the following:Install sudocode CLI
Expected output
Expected output
Verify sudocode-mcp command
Expected output
Expected output
Ctrl+C to stop the server. The MCP server will startup automatically with your agent once configured.Initialize your project
Choose Your Agent
Select your AI assistant to see specific setup instructions:Claude Code
Codex
Cursor
VS Code
Other MCP Agents
Claude Code
Claude Code has the simplest setup thanks to the plugin marketplace:Add sudocode plugin from marketplace
Expected output
Expected output
Install the plugin
Expected output
Expected output
Verify installation
plugin:sudocode:sudocode - upsert_issue, the setup is working!Codex
Codex is not currently supported, but we will support it soon!Cursor
Cursor uses an MCP configuration file in the.cursor directory of your project root.
Setup the MCP Server
Option 1: Automated Setup
Option 1: Automated Setup
What this command does
What this command does
- Creates
.cursor/directory if it doesn’t exist - If
mcp.jsonexists, usesjqto add the sudocode server - If
mcp.jsondoesn’t exist, creates it with the sudocode configuration - Preserves any existing MCP servers in the file
jq (JSON processor). Install it with:- macOS:
brew install jq - Ubuntu/Debian:
sudo apt-get install jq - Other: See jq installation
Option 2: Manual Setup
Option 2: Manual Setup
Create .cursor directory
.cursor directory if it doesn’t exist:Create or edit .cursor/mcp.json
.cursor/mcp.json and add the following configuration:"sudocode" entry inside the existing "mcpServers" object.Save the file
.cursor/mcp.json file.Enable the MCP Server
After creating the configuration (using either option above), you need to enable the MCP server in Cursor: Option A: Click Enable (when prompted) When Cursor detects the new MCP configuration, an Enable button will appear on the left side. Click it to activate the sudocode MCP server.
- Go to Cursor > Settings > Cursor Settings
- Enable the MCP server

Verify Setup
Test that sudocode is working in Cursor by asking it to create an issue: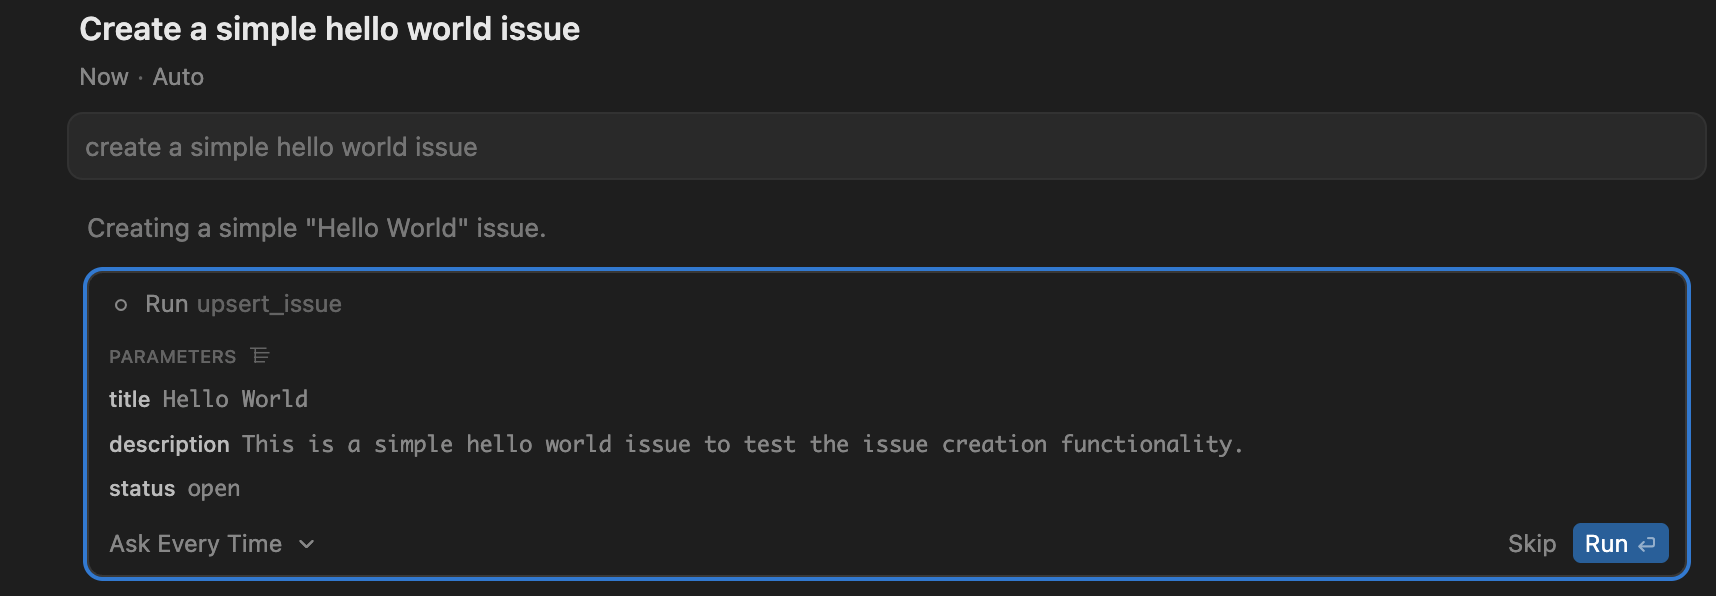
VS Code
VS Code supports MCP through workspace configuration. You can set it up using the Command Palette or by creating a configuration file:Setup the MCP Server
Method 1: Command Palette (Recommended)
Method 1: Command Palette (Recommended)
Open Command Palette
Cmd+Shift+P (macOS) or Ctrl+Shift+P (Windows/Linux) to open the Command Palette.Type and select: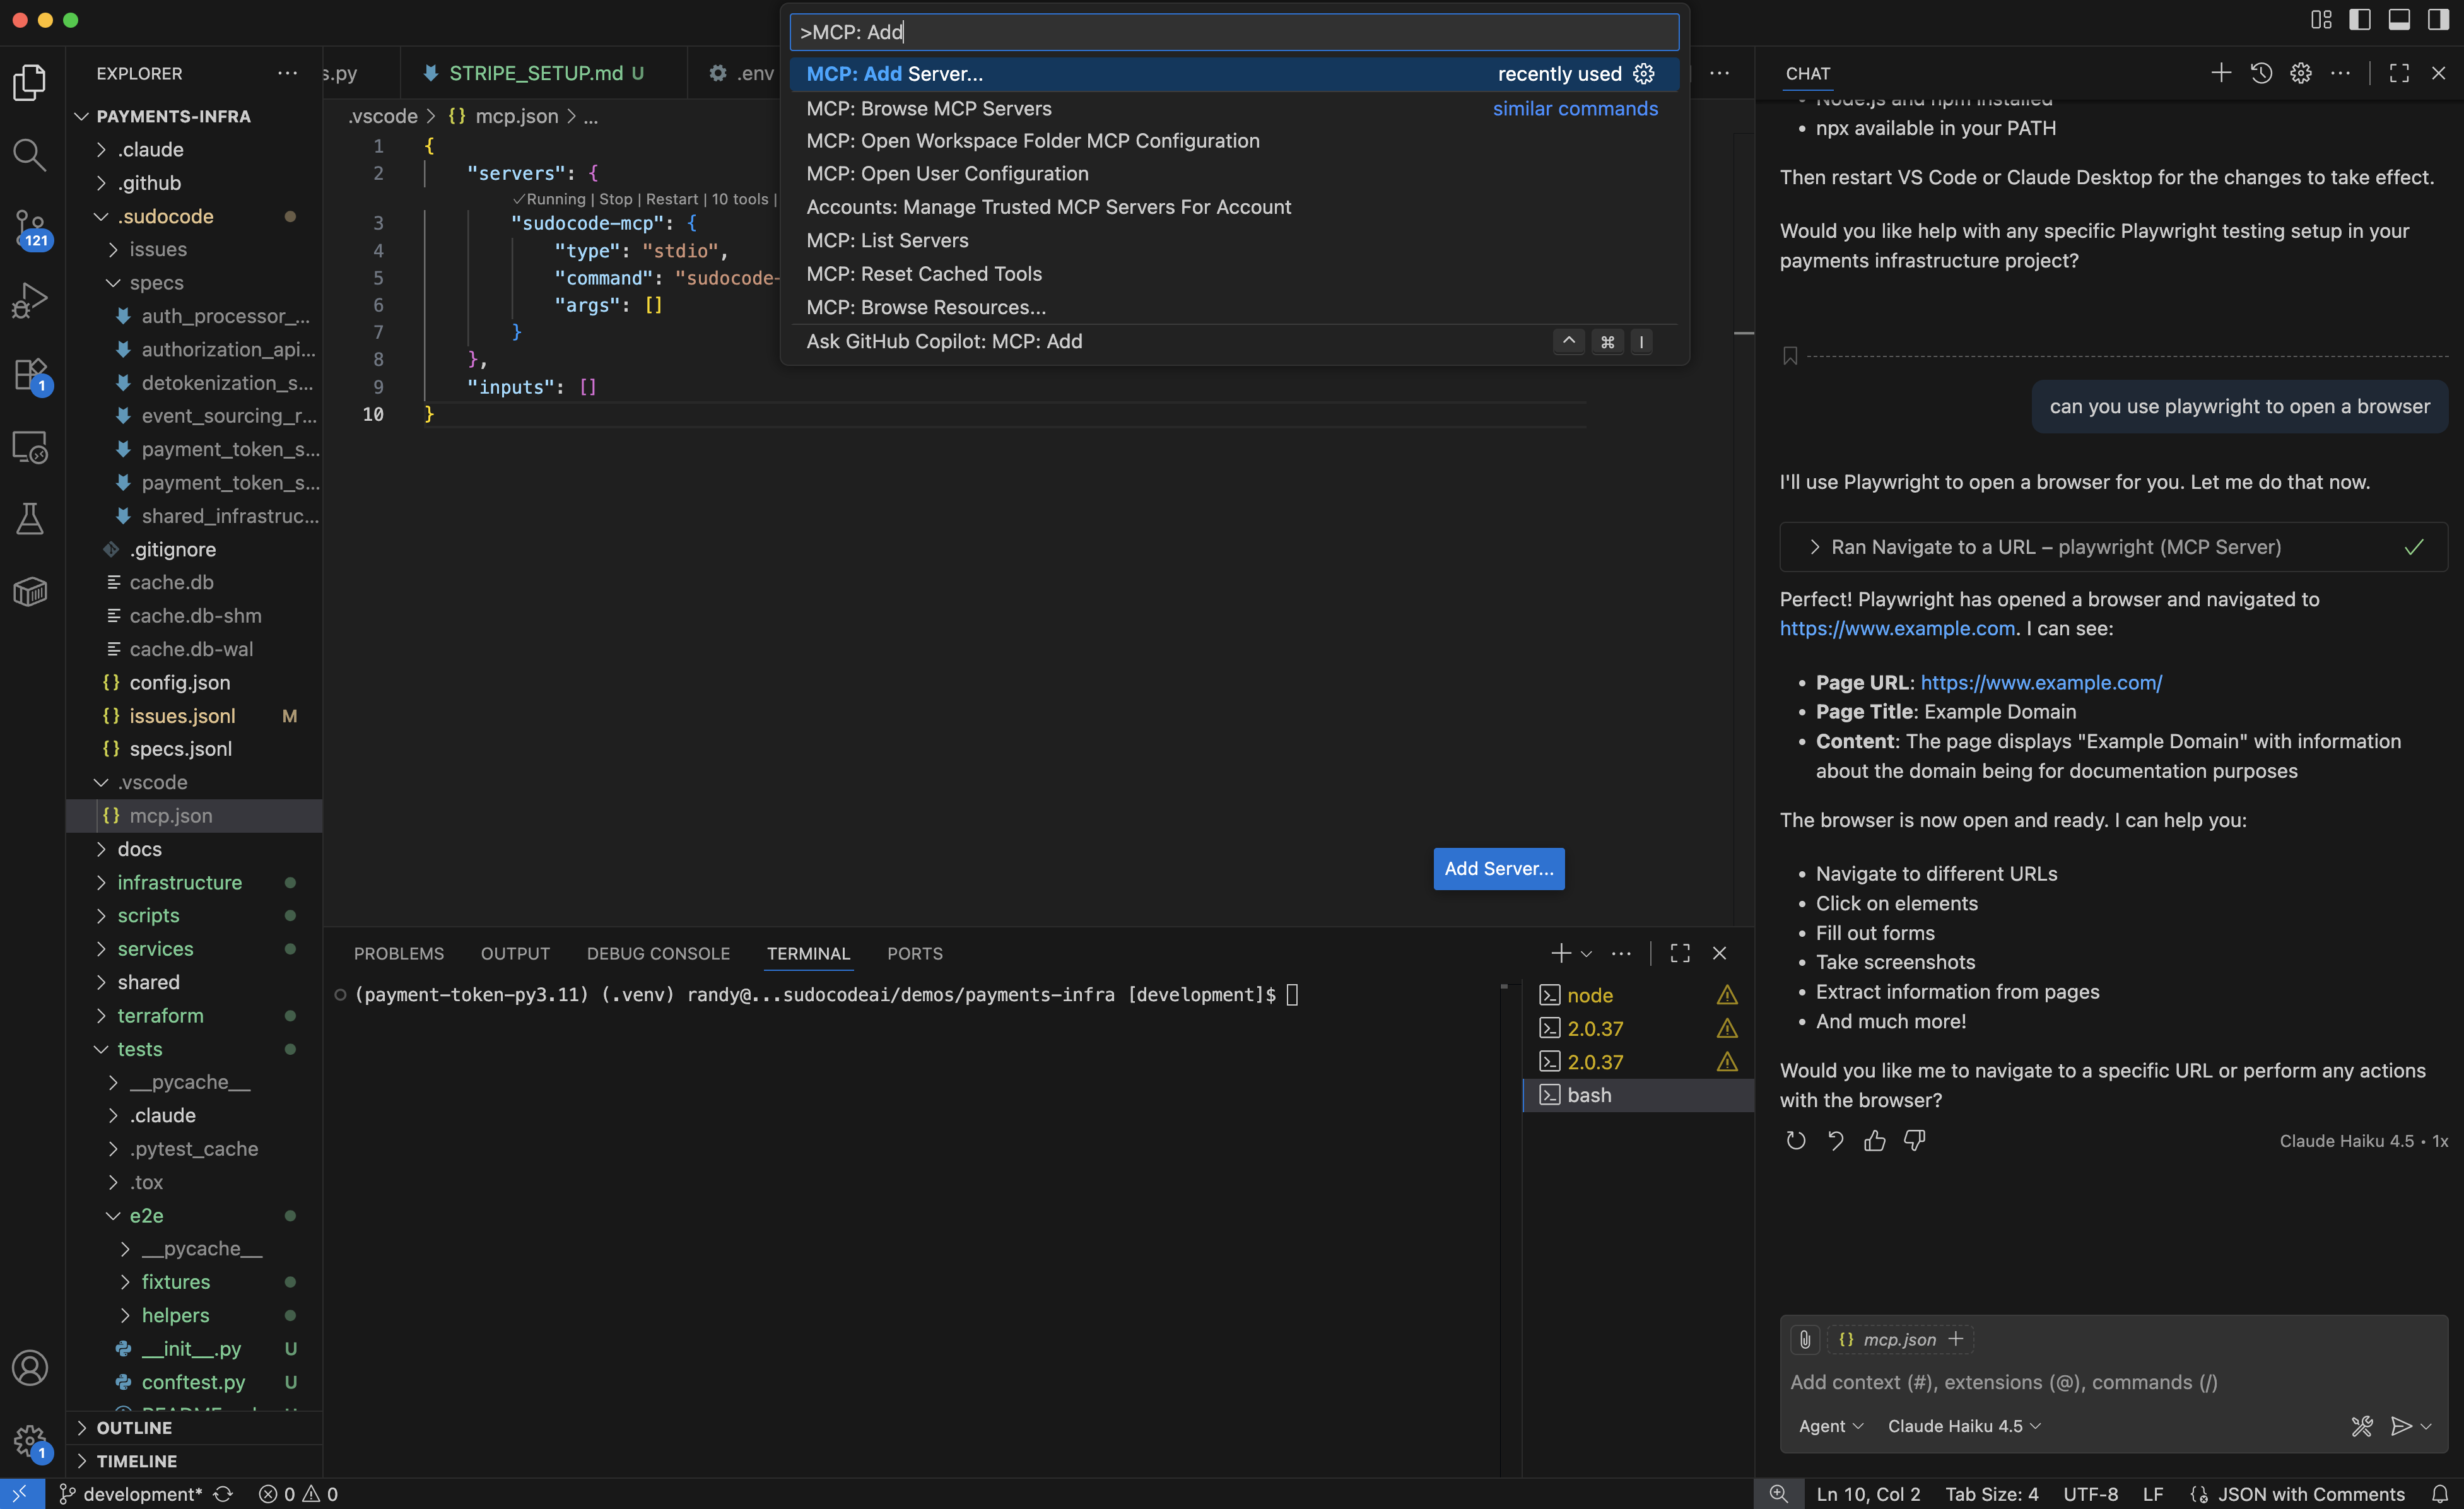
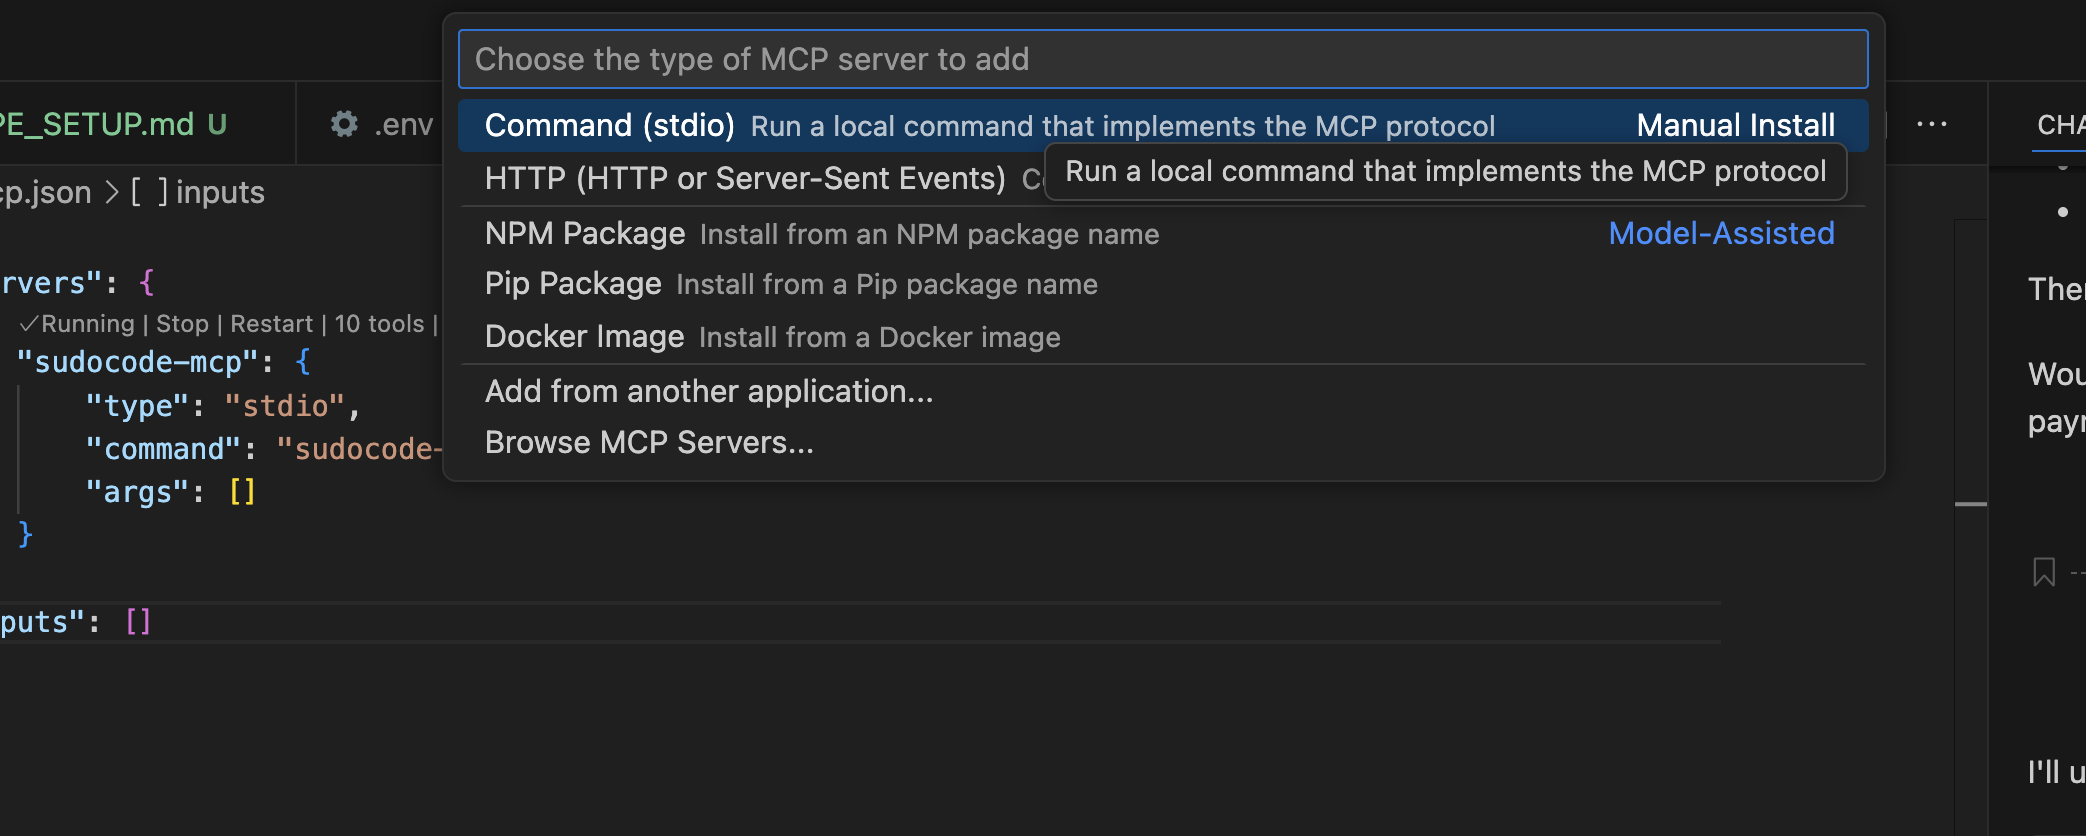
Select Command (stdio)
Enter command
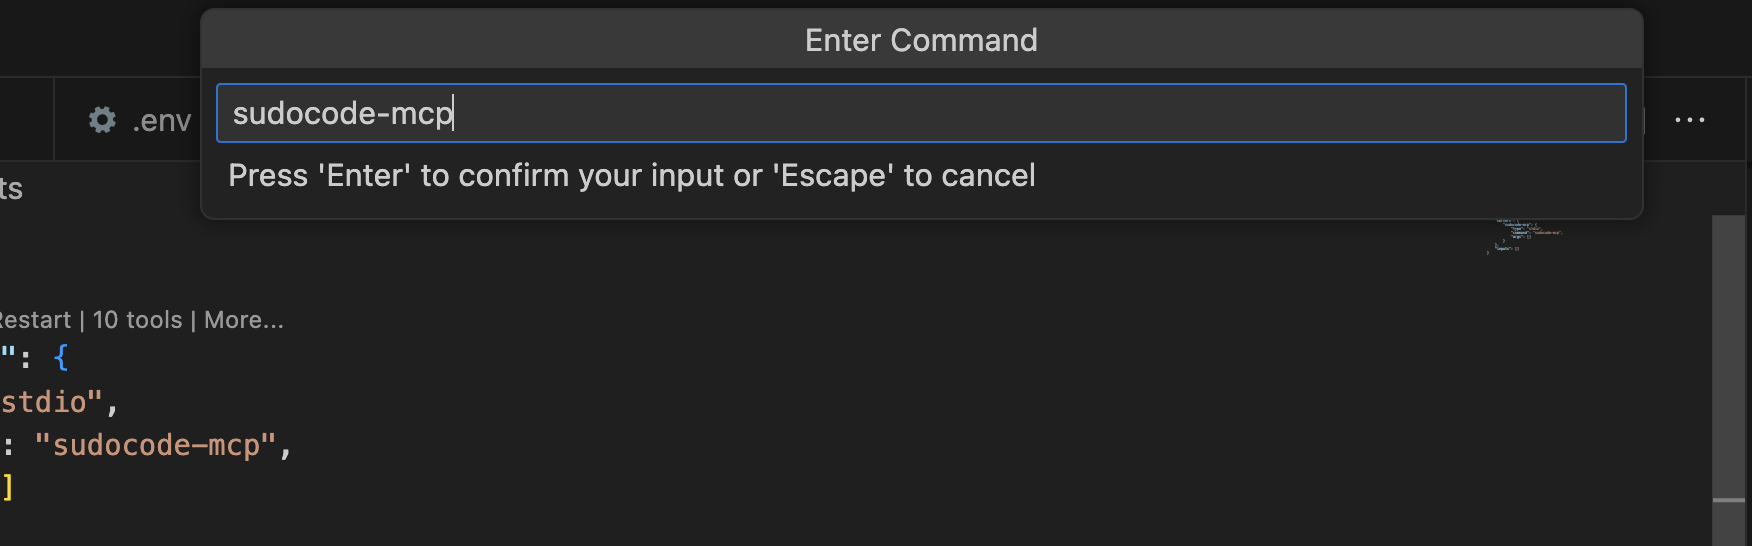
Name the server
sudocode-mcp).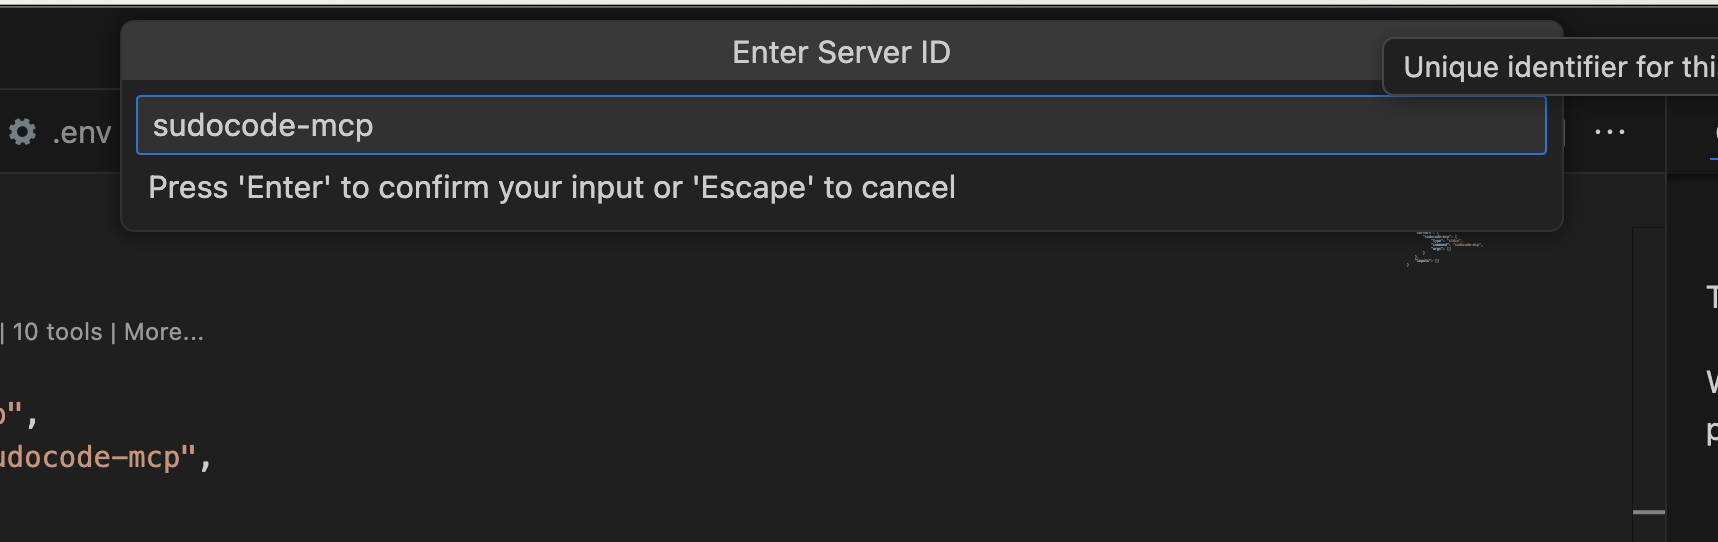
Choose Workspace

Verify configuration
.vscode/mcp.json was created in your project root: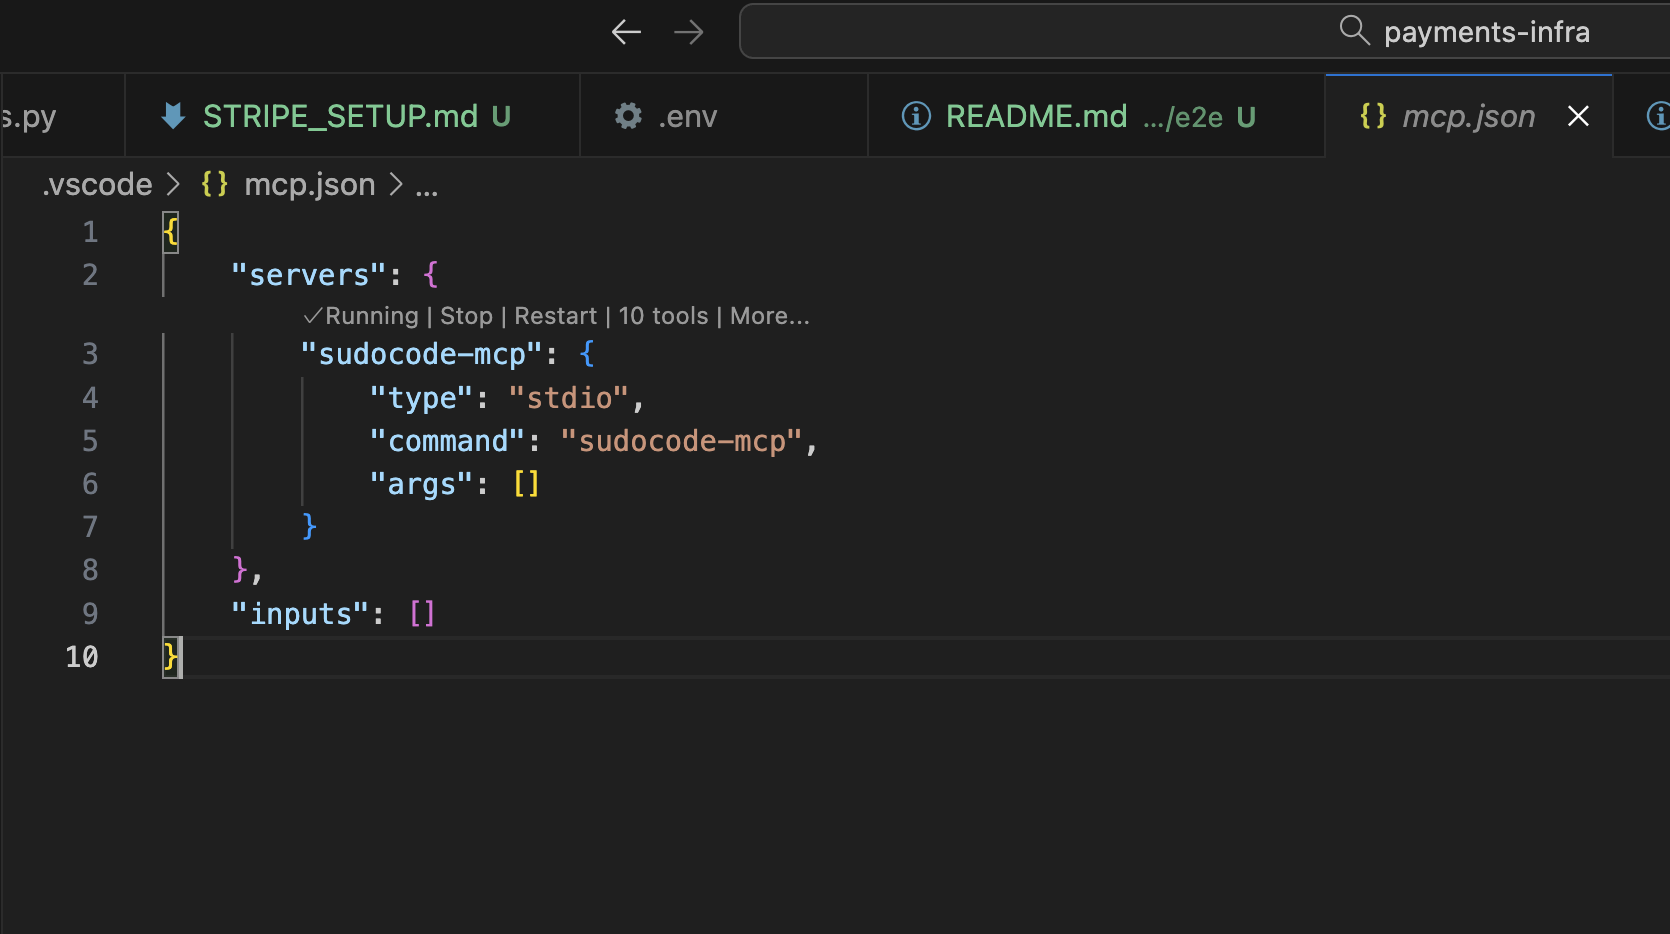
Method 2: Manual Configuration
Method 2: Manual Configuration
Create or update configuration
What this command does
What this command does
- Creates
.vscode/directory if it doesn’t exist - If
mcp.jsonexists, usesjqto add the sudocode-mcp server - If
mcp.jsondoesn’t exist, creates it with the sudocode-mcp configuration - Preserves any existing MCP servers in the file
jq (JSON processor). Install it with:- macOS:
brew install jq - Ubuntu/Debian:
sudo apt-get install jq - Other: See jq installation
Alternative: Create file manually
.vscode/mcp.json with this content:Reload VS Code
- Press
Cmd+Shift+P(macOS) orCtrl+Shift+P(Windows/Linux) - Select “Developer: Reload Window”
Verify Setup
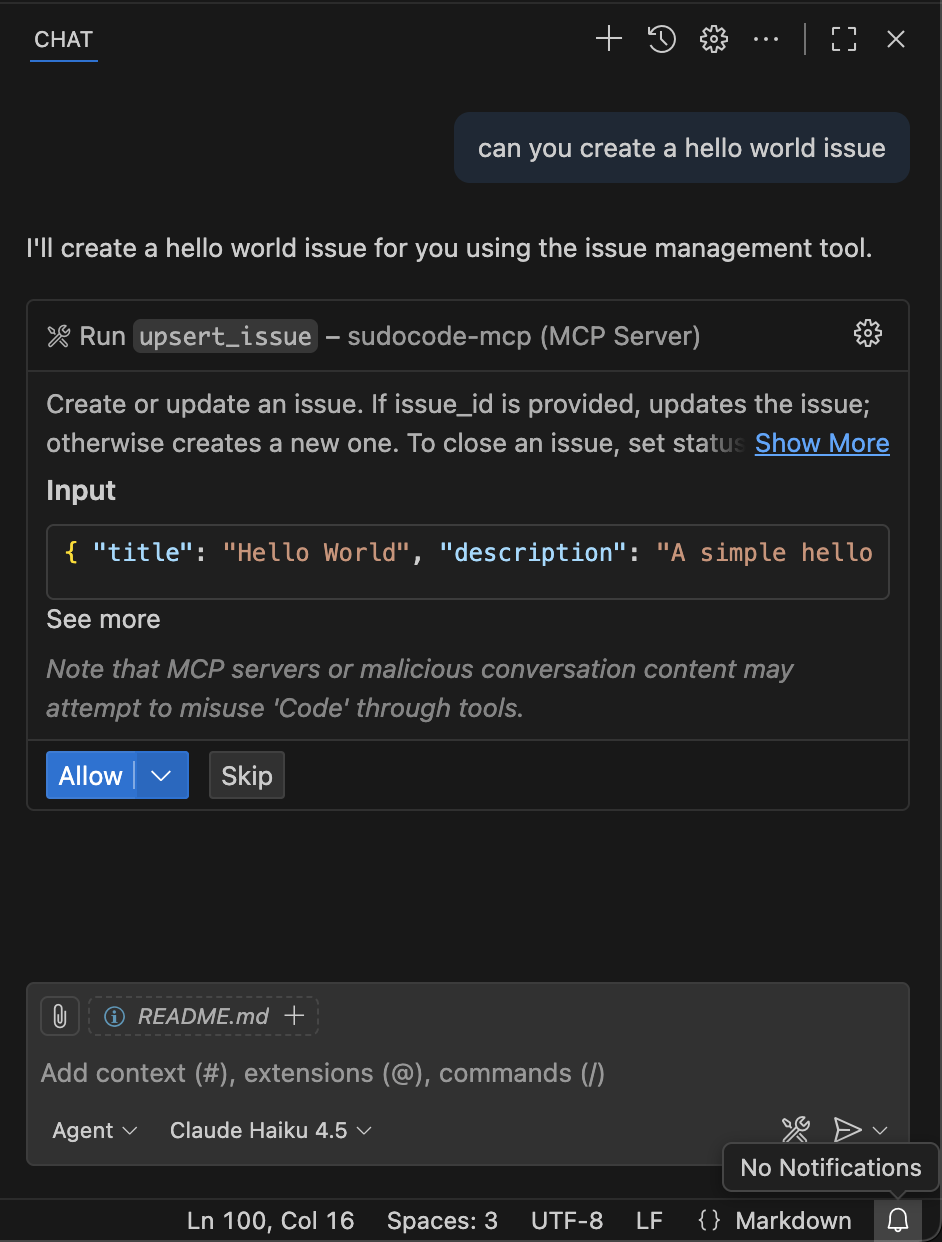
Test that MCP tools are available in VS Code:Test sudocode integration
Other MCP-Compatible Agents
For any MCP-compatible AI agent, you can configure the sudocode MCP server manually:Locate your agent's MCP configuration
- A config file (JSON, YAML, or TOML)
- Application settings UI
- Command-line arguments
Add sudocode MCP server
Restart your agent
Verify the integration
plugin:sudocode:sudocode - upsert_issue, the setup is working!Troubleshooting
Command not found: sudocode-mcp
Command not found: sudocode-mcp
- Install sudocode globally:
- Verify installation:
- If still not found, check your PATH includes npm global bin:
MCP tools not showing up in agent
MCP tools not showing up in agent
- Verify MCP configuration in your agent’s settings
- Ensure
commandis set tosudocode-mcp - Restart your agent completely
- Check agent logs for MCP server errors
Error: Database not found
Error: Database not found
- Verify your project has
.sudocode/directory: - Initialize if needed:
Tools return stale or empty data
Tools return stale or empty data
- Manually sync:
- Check that
.sudocode/cache.dbexists and is not corrupted
Permission denied errors
Permission denied errors
- Check directory permissions:
- Ensure
.sudocode/directory is readable and writable - Verify the user running your agent has file access
- On macOS, check System Settings � Privacy & Security
Plugin install fails (Claude Code)
Plugin install fails (Claude Code)
- Verify you added the marketplace source:
- Check network connectivity
- Check Claude Code logs for detailed errors